How to enable the i-scribe/Shexie Platinum integration
This article provides a step-by-step process for turning on the i-scribe / Shexie Platinum integration.
This guide outlines the step-by-step process for enabling the integration between i-scribe and Shexie Platinum, including setup on both platforms and instructions for launching the integration from within a patient's clinical record.
Part 1: Setting Up on i-scribe
- Log in to your i-scribe account.
- From the main menu, click Settings.
- Select the Integrations tab.
- Click Add Integration.
- From the drop-down list, choose Shexie.
Loading video player...
Part 2: Setting Up on Shexie
- In Shexie, navigate to: Table Maintenance → Security Maintenance → Update a User.
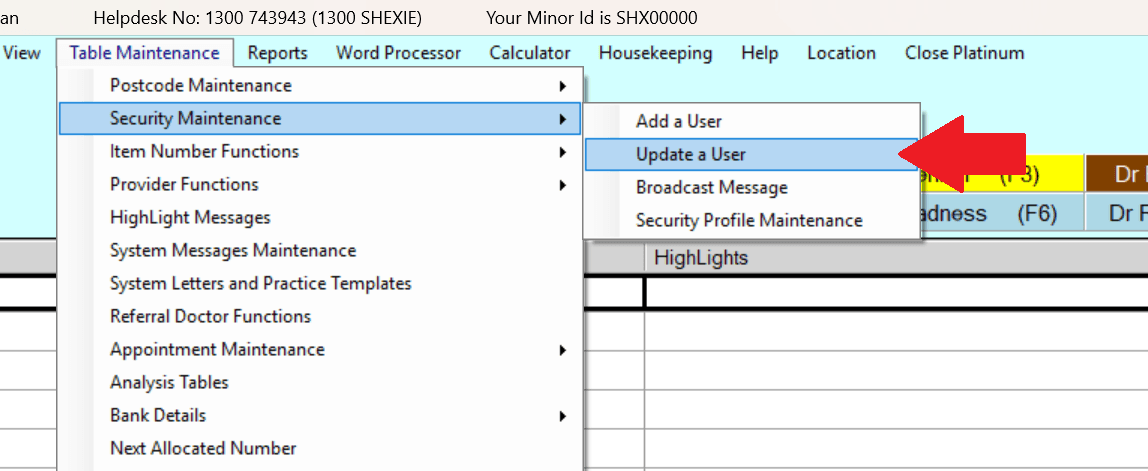
- From the list of users, select your name.
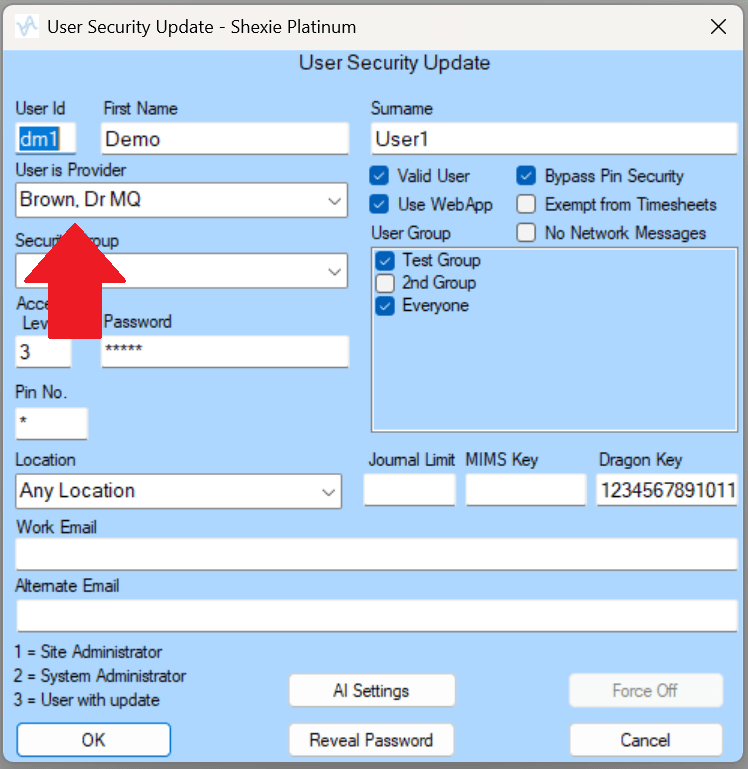
- Look for the "User is Provider" field (shown in the screenshot below with red arrow). Confirm that those details are correct, and that the correct user is linked to the correct Provider.
- This must be entered under the same user login that has the i-scribe license attached and once set correctly the appointments should flow as per the previous information.
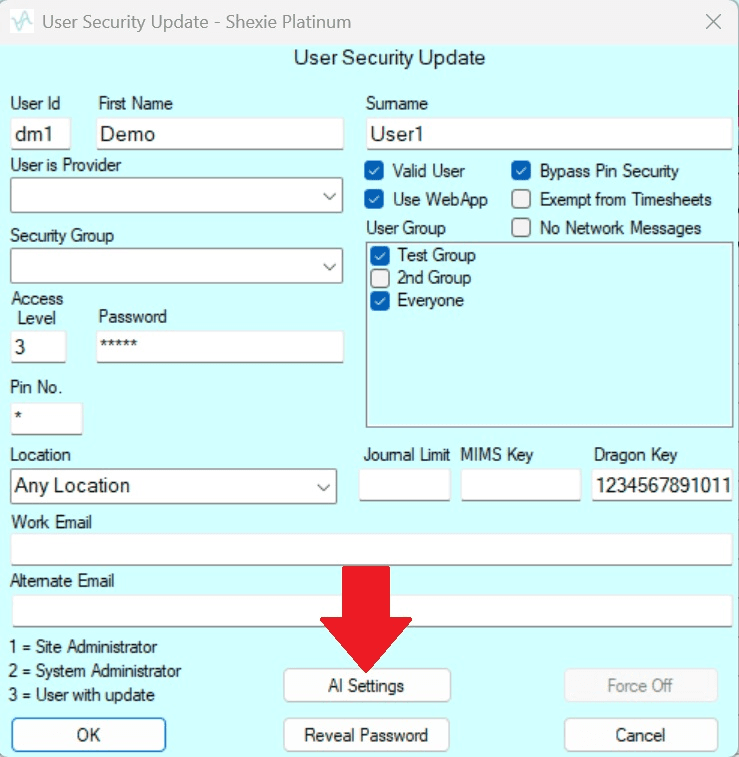
- Click on the AI Settings Menu (shown below):
- In the new panel that appears, enter the same email address you used to register for i-scribe.
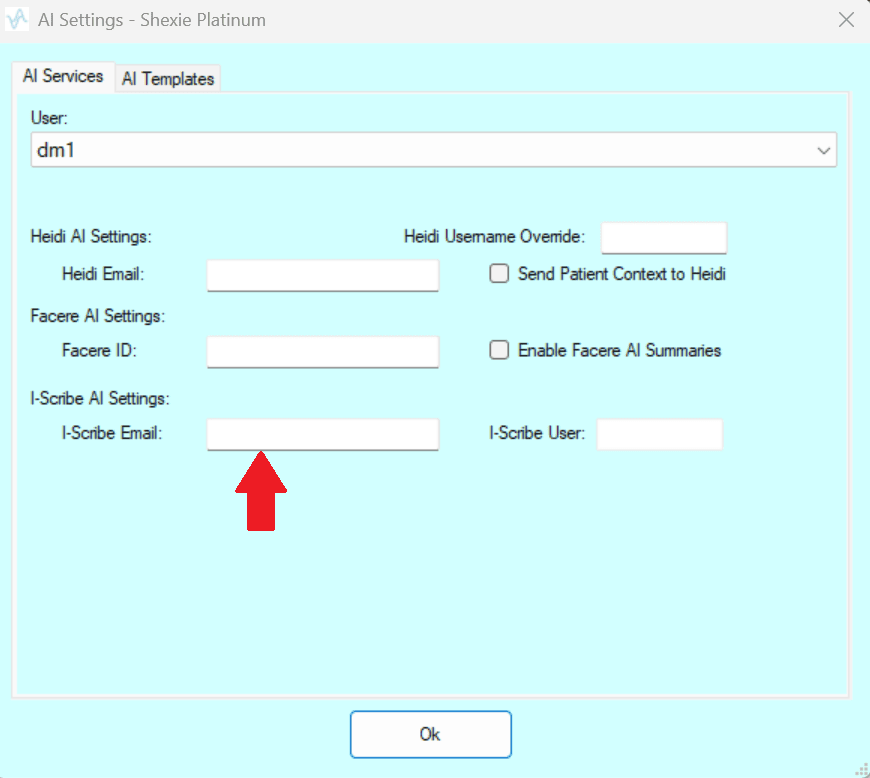
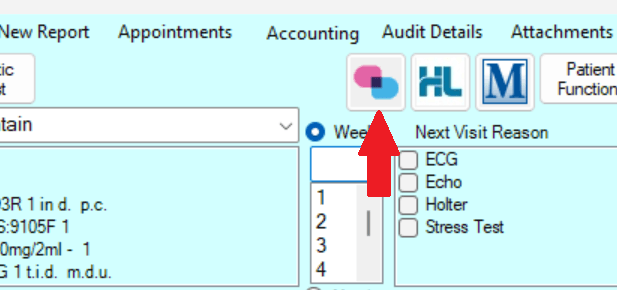
- Once the email is entered, the i-scribe logo will appear within a patient's clinical record.
Part 3: Launching the Integration
- After completing both setups, open a patient's clinical record in Shexie.
- Click the i-scribe logo to launch the integration directly from the patient file.
- Do this step for each patient.
- This video explains how to use the Shexie integration: https://www.shexie.com.au/i-scribe-now-available-via-shexie-platinum/
Part 4: How to create a Shexie template that works with i-scribe
- Each Shexie practice has instructions available via their Shexie portal, in Shexie follow these steps to find this information:
- Help --> Shexie Client Portal --> Training Videos menu: How to clone an existing Template.
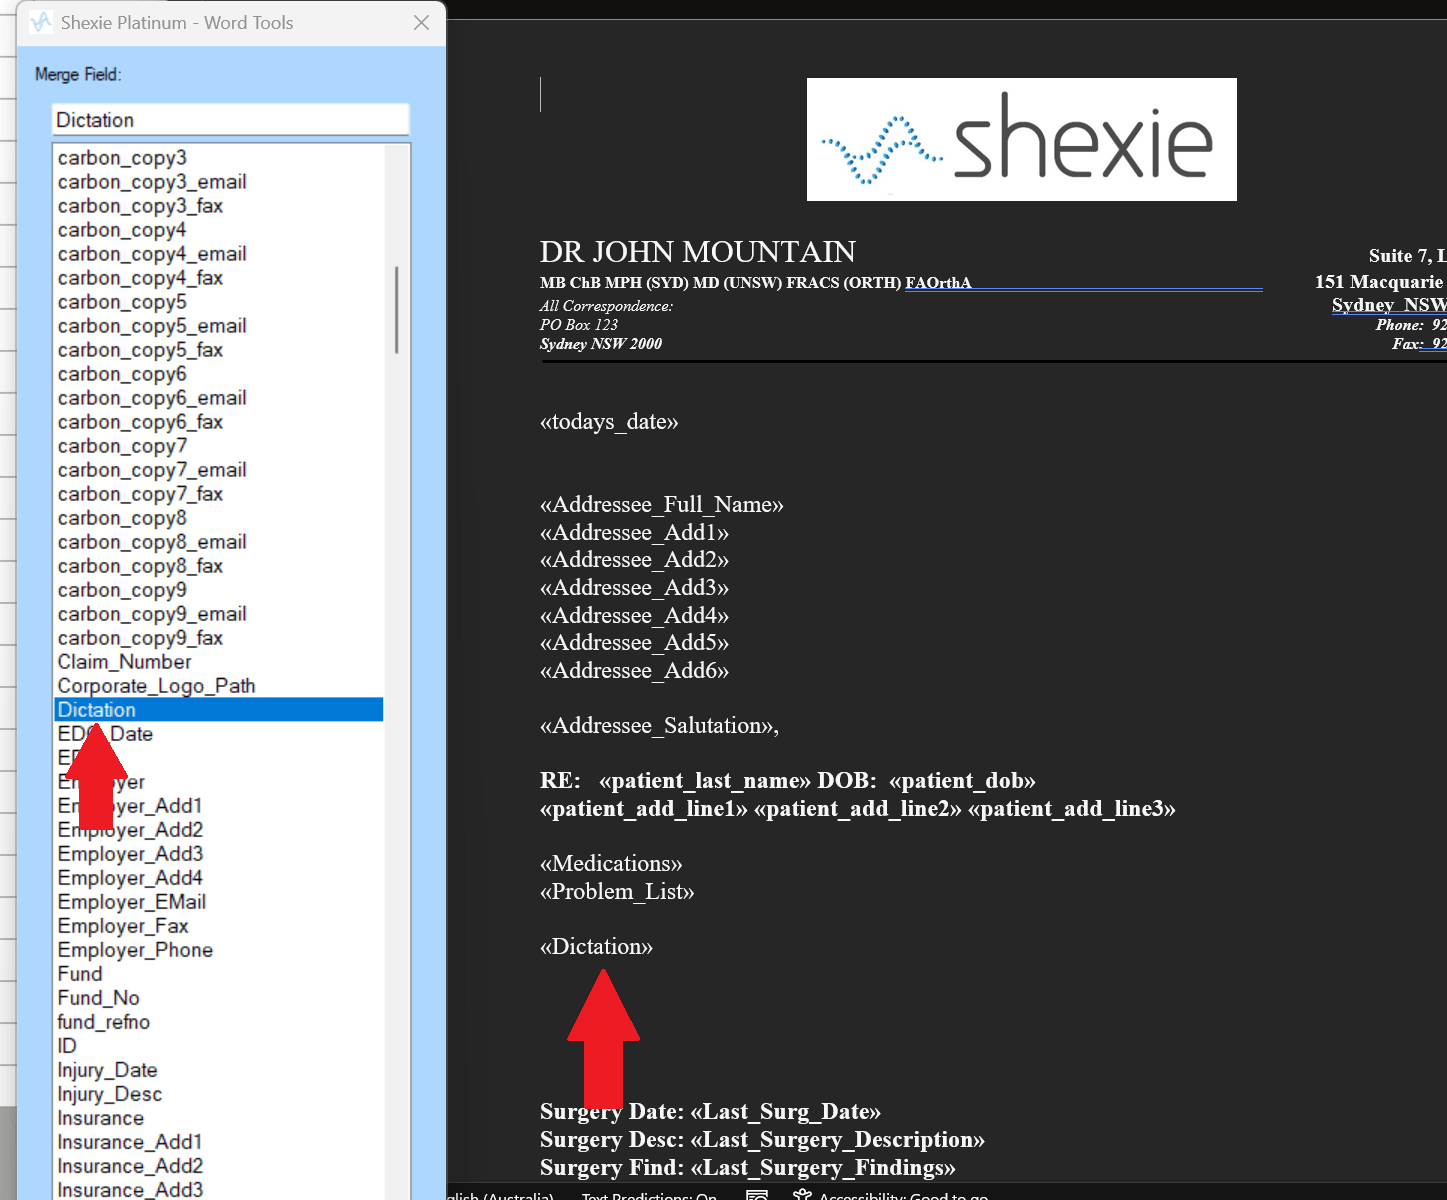
- To enable an existing template to be capable of receiving information from i-scribe, then you have to do add a specific 'Dictation' merge field to the template in question.
- To do this, go to Table Maintenance --> System Letters and Practice Templates --> Select the provider --> Click Practice Templates (in the top right).
- Once the desired template is located, open the file into word and once the document opens, there will be a second panel that will appear with a list of fields within.
- Highlight the field called 'Dictation' and then when the cursor is flashing in the desired spot within the document layout, click the "Add Field" button to add it into the document similar to the screenshot below.
- Simply save and close the template to complete this step and then repeat for any additional templates they wish to use with i-scribe.
Tips & Troubleshooting
- Make sure the email entered in Shexie exactly matches your i-scribe account email.
- If the i-scribe logo does not appear, recheck the email entry and ensure the integration is activated in i-scribe.
- For technical assistance, contact your organisation's IT team or i-scribe support.
Was this guide helpful?