Genie Integration Part 1: Install i-scribe Genie Agent - V 6.8 - IT Instructions
Before you begin, ensure you have the below information. This will have been sent via a 1password link to someone on your team. It will contain the following 3 data credentials:
The following steps should be done by your IT department on your server that hosts your Genie software
Prerequisites
Before you begin, ensure you have the below information. This will have been sent via a 1password link to someone on your team. It will contain the following 3 data credentials:
- YourAkuru API Key / API Key
- YourGenie API Password / Genie API Key
- YourGenie Sender (Practice Name)
Secondly, you must have Administrator access on your Genie server
Step 1. Install the Akuru Sync Agent
- Downloadthe Akuru Sync Agent
- Right-click the downloaded file and selectRun as administrator.
- Follow the installation prompts until complete.
- Once the installation is complete, select "Open Akuru sync Web UI"
Block FieldBlock Field
- Select advance and proceed to agent
- The agent will automatically launch
- Set your master password
- **Please record this password in a safe location, as we cannot reset your password
Step 2: Configure your Akuru Sync Agent Settings for Genie
- From the left-hand menu, select theintegrations tab
- Select "Add Integrations"

- SelectGenie EMR
Block Field
- Select "Auto Detect"
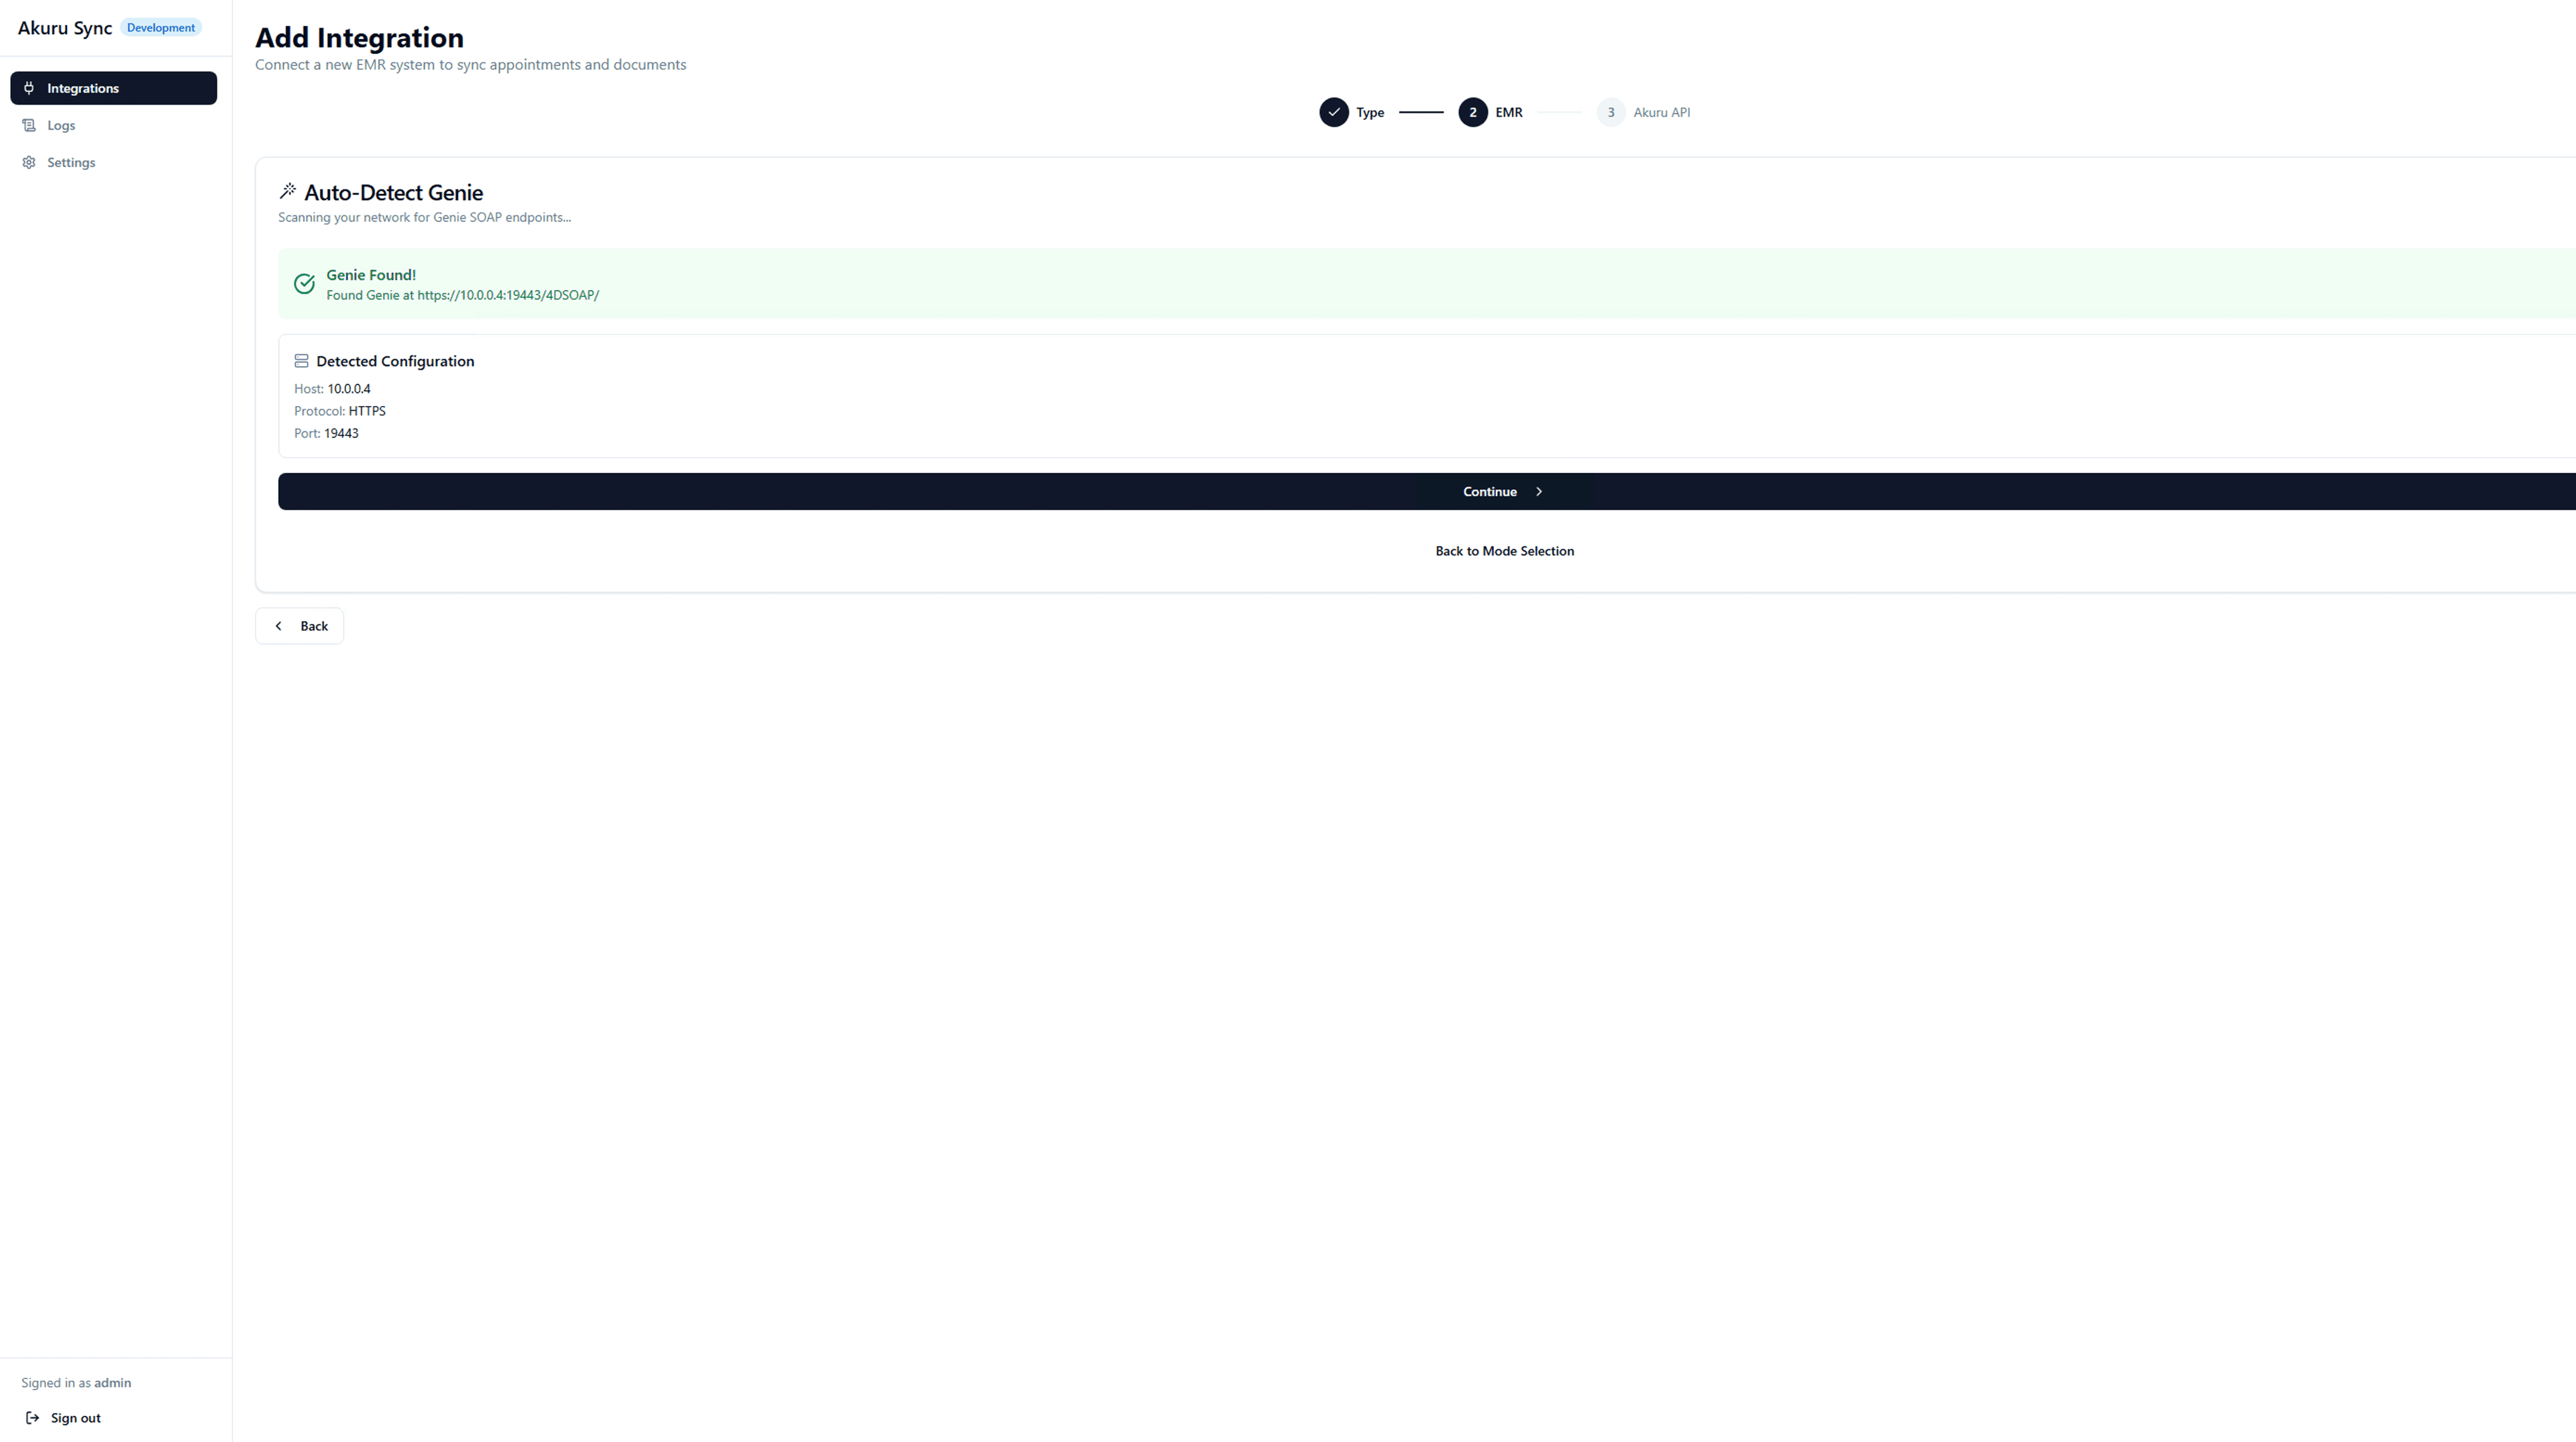
- If Genie server ishosted in a server different to the server you are installing Akuru Sync, pleaseSelect "Manual Configure and enter the Genie server IP.
2.3 Genie API Password (aka Genie API Key)
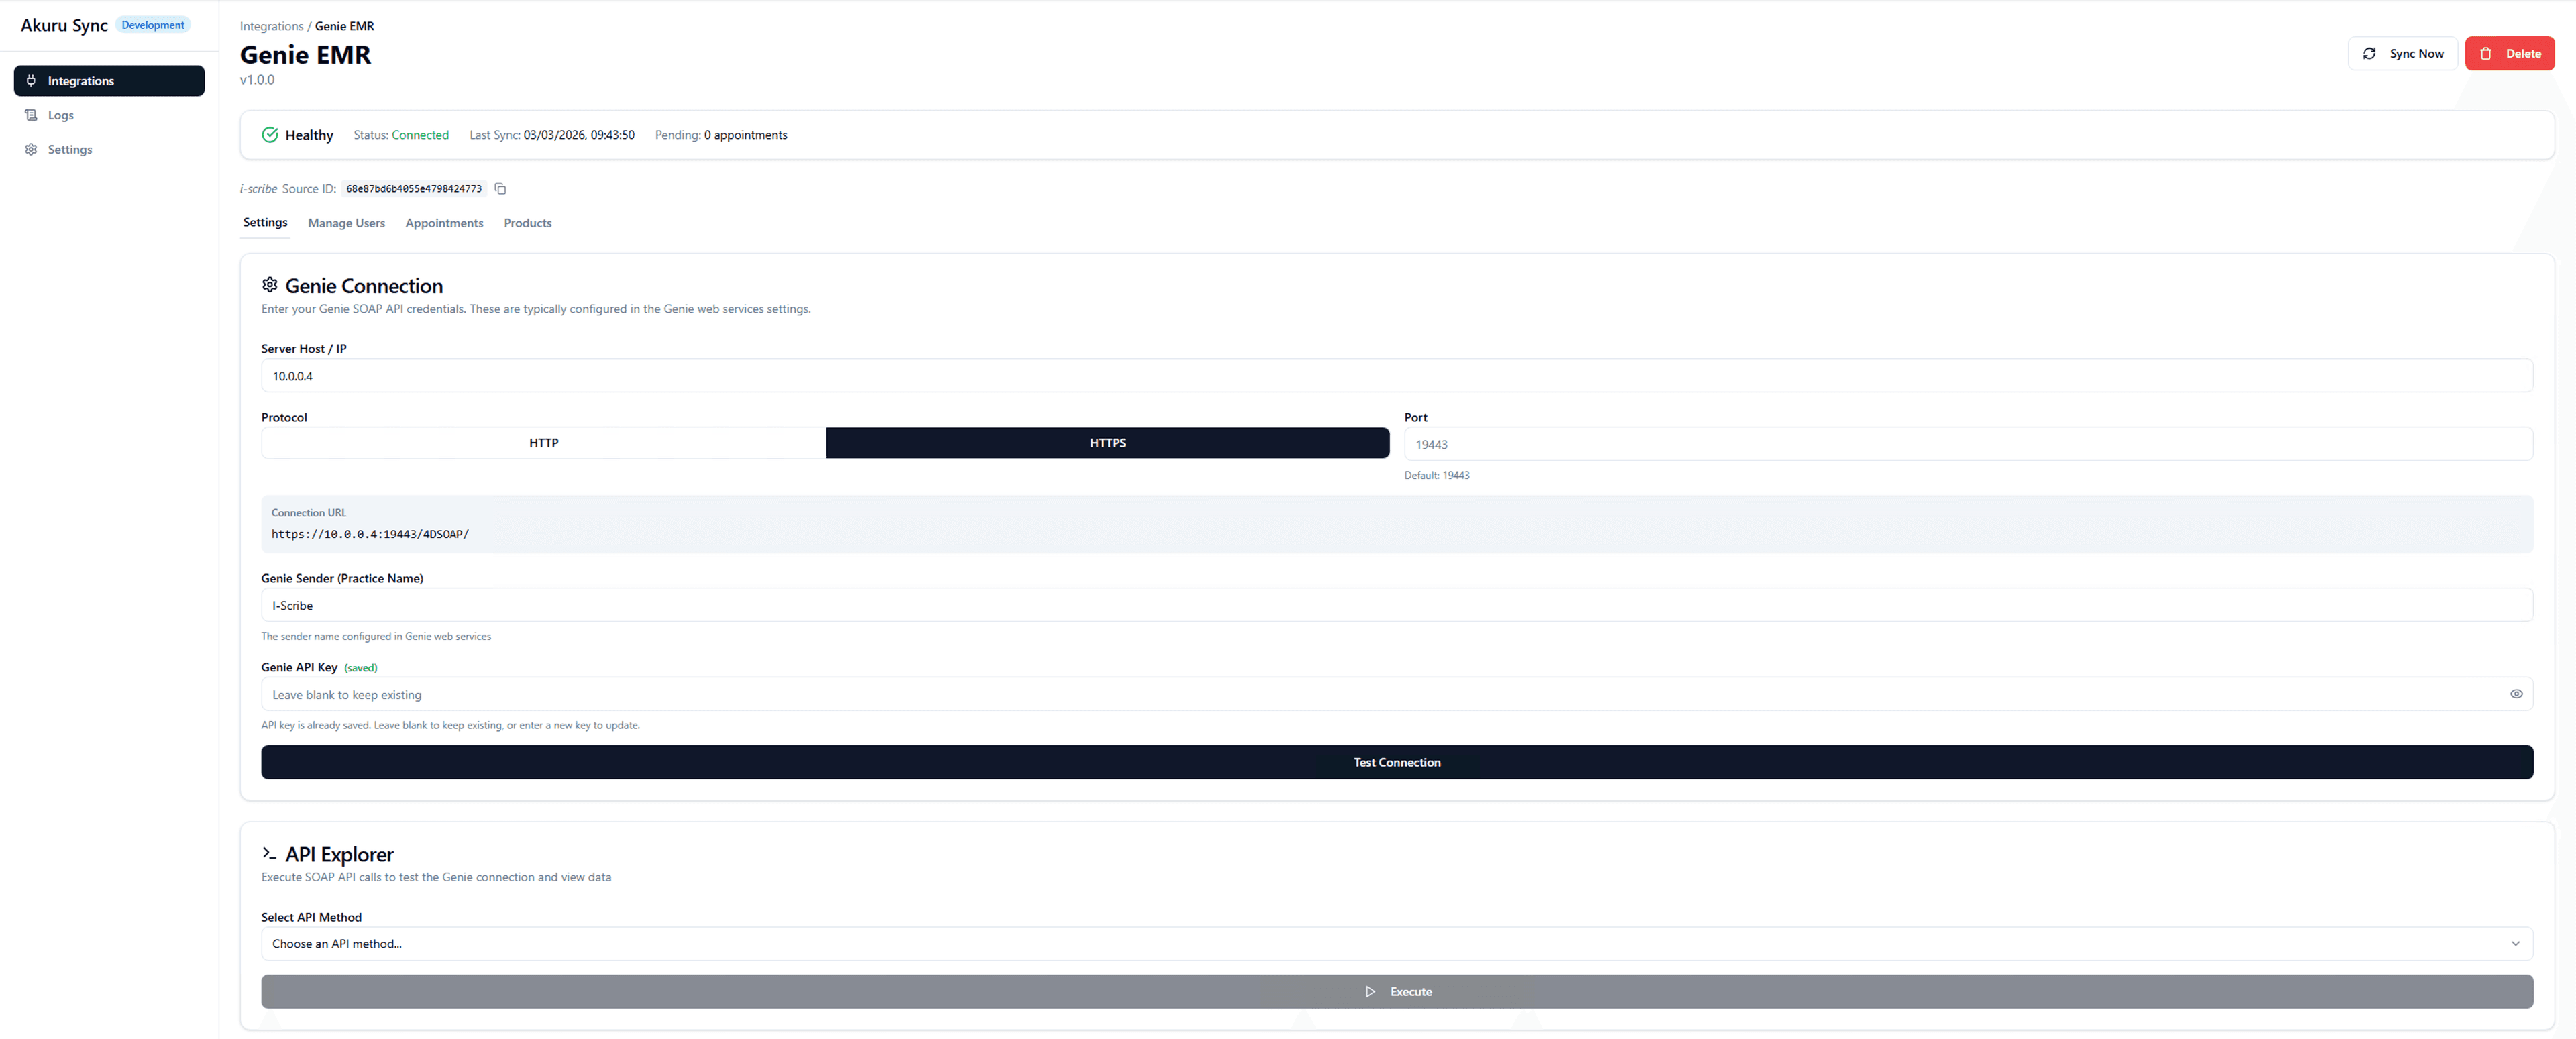
- Enter your"Genie Sender (Practice Name)" and use the"Genie API Key /Genie API password" provided (1Password link sent from info@akuru.com.au ) (see screenshot below).
Block Field
- ClickTest Connection to confirm the connection is successful.
2.4 API Key / Akuru API Key
- Paste the "API Key / Akuru API key" from your onboarding email ( 1Password link, sent from info@akuru.com.au) into the fields underAkuru Integrations (see image below).
- ClickTest Connection to confirm the connection is successful.
- You will then be shownthe Integration Source ID. Your clinician/Practice manager will need this to complete the integration.
2.5 Genie Installation Configuration (optional)
Only change these settings if Genie is installed somewhere other than the default location. Most practices can leave this section alone.
Once Genie is connected, open the Genie integration and expand Genie Installation Configuration on its settings tab:
- Genie Install Folder - the folder where Genie is installed on this server. Defaults to
C:\Genie. Only change this if your practice installed Genie somewhere else. - Genie ID - your practice's Genie identifier. Leave this blank and the agent auto-detects it from the install folder.
Click Save once you're done.
**Step 3. Add Users
**
This will link your Genie clinicians with their i-scribe accounts.
- SelectIntegrations from the left-hand menu.
- Select "Manage User "
- Select "Map a user"
- Match the i-scribe email address with the name of the user.
- E.g. Dr Andrews Jones , mapped with drandrewjones@gmail.com (i-scribe email address, provided to you by the i-scribe support team)
- Click "Save Mapping"
- Please note, the status will say "Disconnected" (see image below) until the clinician activates the integration from their i-scribe account with theirIntegration source ID.
- If you do not have the i-scribe user email address, then this will need to be added later to activate the integration.
Was this guide helpful?