How To Change, Remove, or Add an Email Address To Your Account
Add, remove, or change the primary email address on your i-scribe account from Manage account in your profile menu.
The quickest way to update your email address is to do it yourself in your i-scribe account. If we change it manually for you, we need to verify your identity in several steps for security reasons.
Your account details have moved. They are now under your profile (your name in the top right corner) > Manage account, not under the settings (gear) icon.
Summary
Click your name in the top right corner of i-scribe.
Click Manage account.
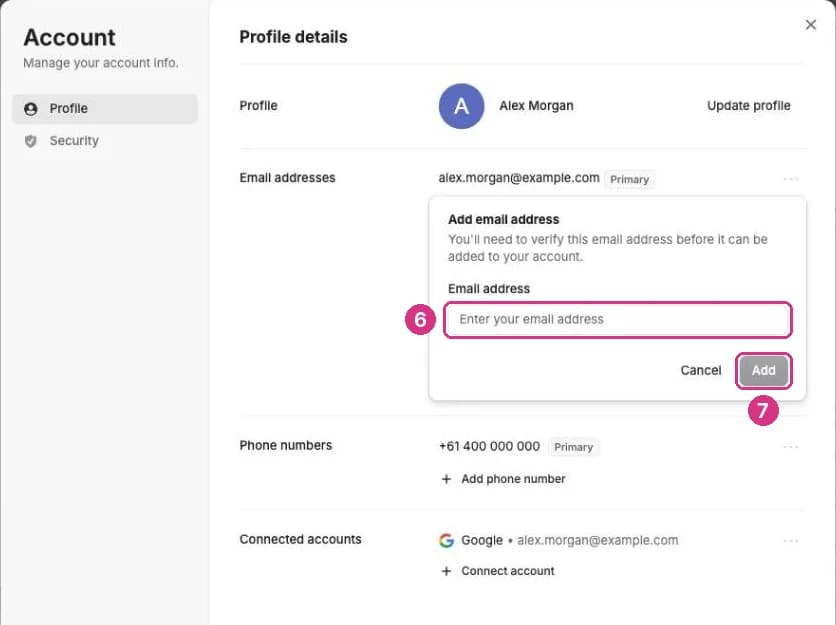
To add an email address, click + Add email address, enter the address and click Add.
To change or remove an address, click the three dots next to it.
Select Set as primary or Remove email.
To change your email address, add the new address, set it as primary, then remove the old one.
Detailed steps
Image 1: Open Manage account
- 1: Click your name in the top right corner to open the profile menu.
- 2: Click Manage account.
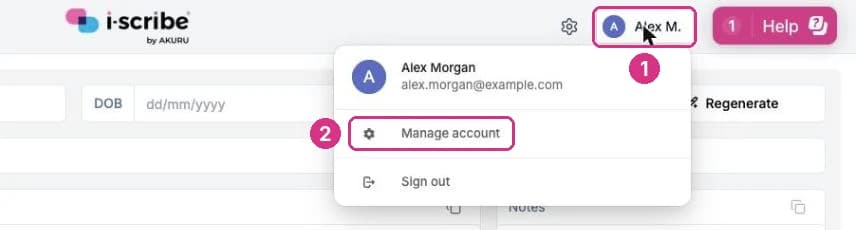
Image 2: Add, remove, or set a primary email address
The Email addresses section lists every email address on your account. Your primary address has a Primary label next to it. You may need to change which address is primary for some EMR integrations.
- 3: To add a new email address, click + Add email address (see Image 3).
- 4: To set an address as primary or remove it, click the three dots next to that address.
- 5: Select the option you need, either Set as primary or Remove email.
If you don't see Set as primary, that address is already your primary email address.
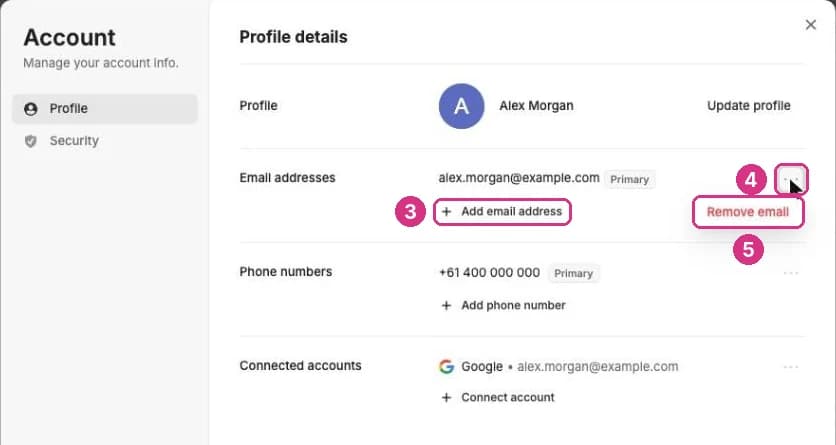
Image 3: Enter the new email address
- 6: Type the new email address.
- 7: Click Add, then verify the address using the code sent to it. The address is added to your account once it is verified.
Please let us know if you have any other questions.
Was this guide helpful?