How to select outputs during a consult
The changes you make to the template selection during a consult apply only to the current session. When you click New Patient and start a new session, your Default Outputs will automatically reappear in the Consult Parameters section.
This guide will walk you through the steps to select or modify the outputs you wish to use during a consultation. This is useful if you want to generate documents different from your default outputs, for a specific session.
1. Navigate to the "Select Outputs" Button
- Open i-scribe.
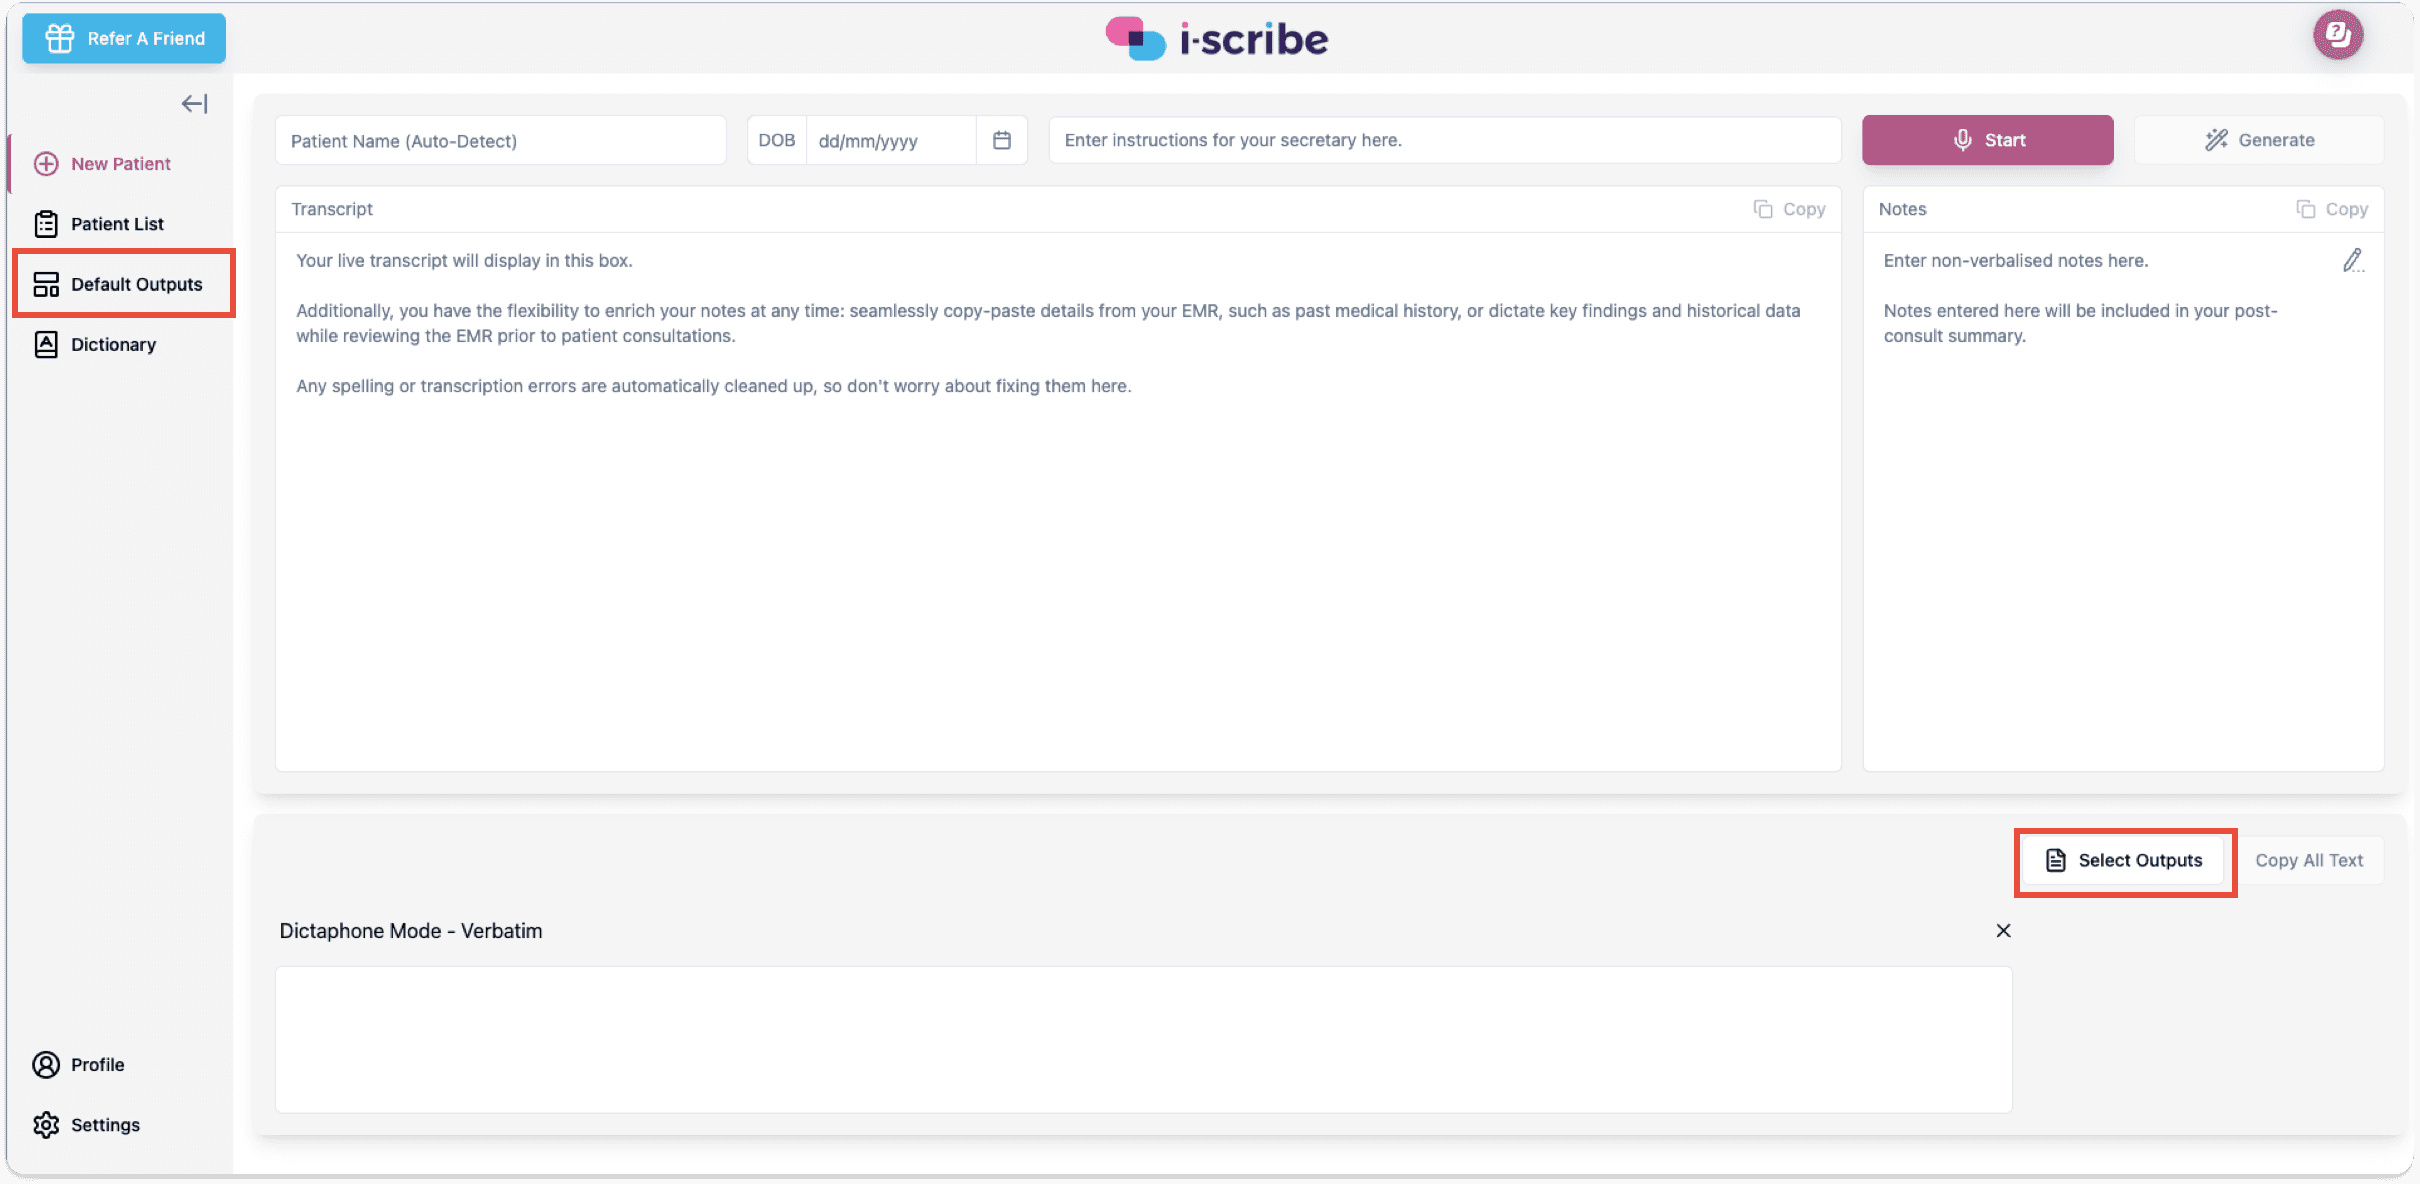
- Look for the "Select Outputs" button on the bottom right of your interface. This is where you can manage settings for the current consultation.
- Click on the "Select Outputs" button, shown by the red box on the right of screenshot below:
- The red box on the left of the screenshot below is for the "Default Outputs", e.g. the outputs you'd like to appear by default for a new patient.
2. Choose the Outputs You Want
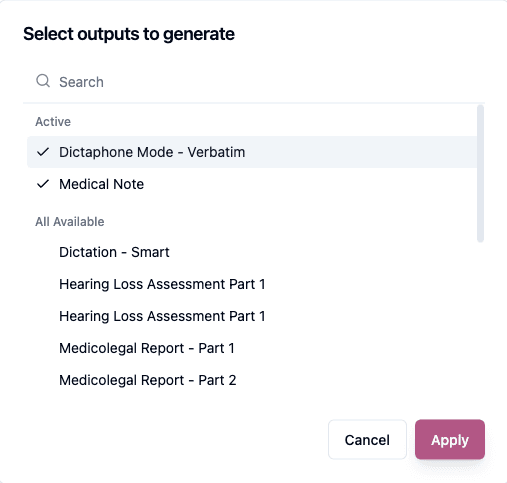
- Review the list of outputs that appears in the dropdown menu.
- Click on the option you want to include for this session. Selected templates will be ticked, and sit at the top of the list under Active.
3. Deselect Unwanted Outputs
- If any outputs are pre-selected but not needed for this consultation, click on them to deselect. Deselected templates will no longer be ticked.
4. Confirm Your Selections
- Ensure all necessary outputs are ticked. These outputs will be generated for this specific session, and will appear at the bottom of the main interface.

5. Continue with the Consult
- Once your selections are made, proceed with your consult as usual. The documents will be generated based on your updated selection.
The changes you make to the template selection during a consult apply only to the current session. When you click New Patient and start a new session, your Default Outputs will automatically reappear in the Consult Parameters section.
Was this guide helpful?