Genie Integration Part 2: Set up your templates and send documents back to Genie
Stage 2 of the Genie integration sends i-scribe consultation notes and letters back into Genie. Prepare your Genie templates, add the dictation tag, map each i-scribe output, and request the Approved for Genie button.
Stage 2 of the i-scribe and Genie integration sends documents created in i-scribe back into Genie. Stage 1 synchronised your Genie day list into i-scribe. Stage 2 returns consultation notes to the patient's consultation record, and letters to Genie's outgoing correspondence area where your admin team can review, finalise and send them.
There is no additional cost. Stage 2 is included in your i-scribe subscription.
Stage 2 needs the Akuru Sync Agent installed and configured on your Genie server first. If that has not been done, start with Genie Integration Part 1: Install i-scribe Genie Agent.
Watch the walkthrough
Dr Jamie Chew, Ophthalmologist and Founder of Akuru, works through the whole template setup in this recording. The step timings below refer to it.
What Stage 2 adds
- Consultation notes return to the patient's consultation record in Genie, attached to the relevant appointment.
- Letters return to Genie's outgoing correspondence area for your admin team to finalise and send.
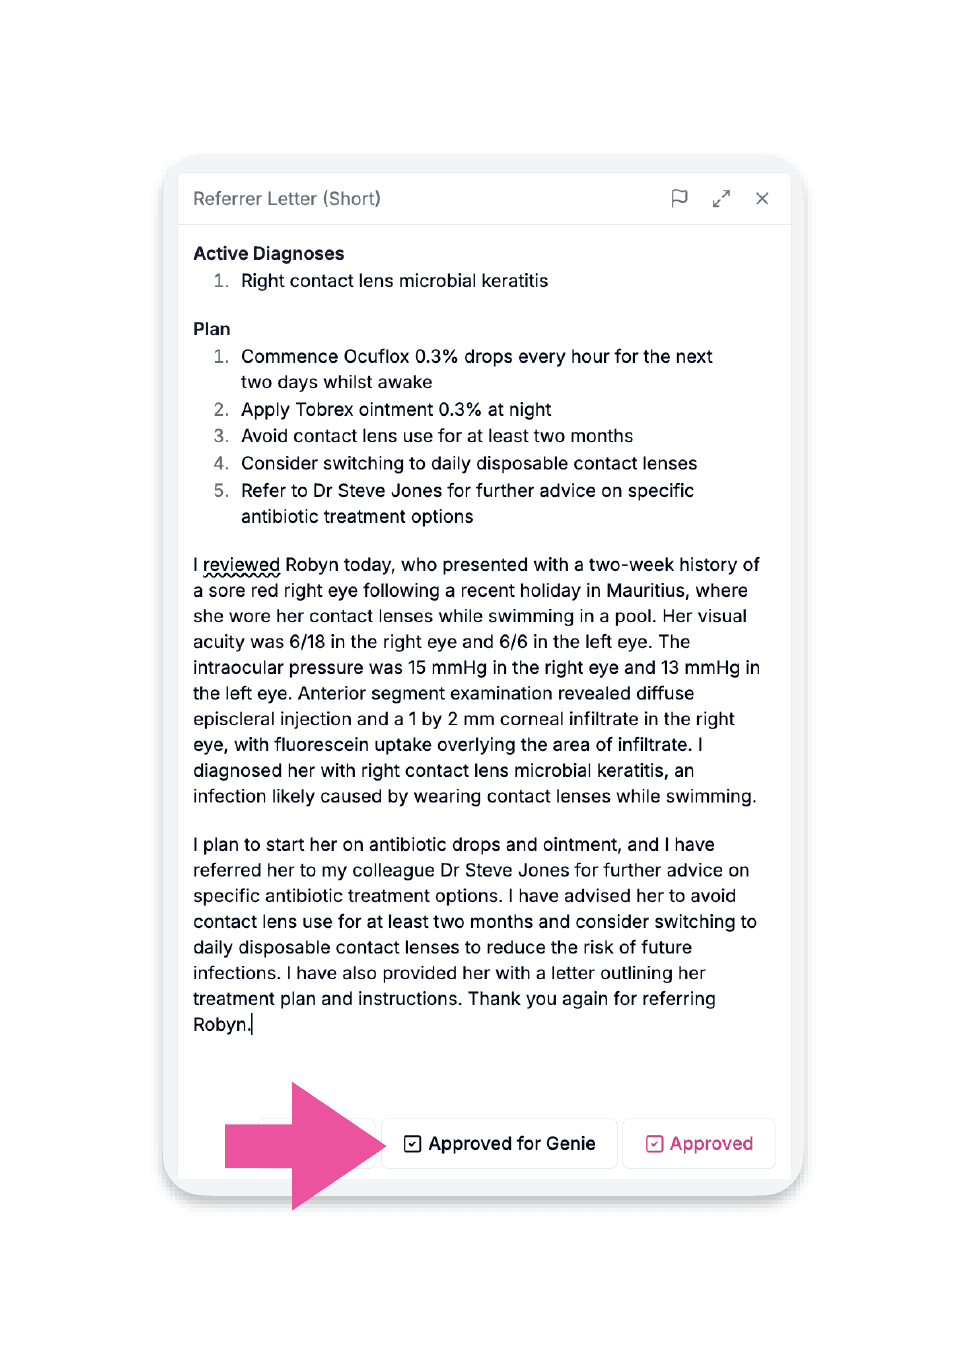
- A new "Approved for Genie" button appears in i-scribe, which is what sends the document across.
Before you start
You need a Genie login that can edit templates, plus access to each clinician's i-scribe account. It helps to do this alongside the clinician or practice manager who knows which i-scribe outputs each clinician actually uses.
Set up your templates
Step 1: Prepare the Genie templates
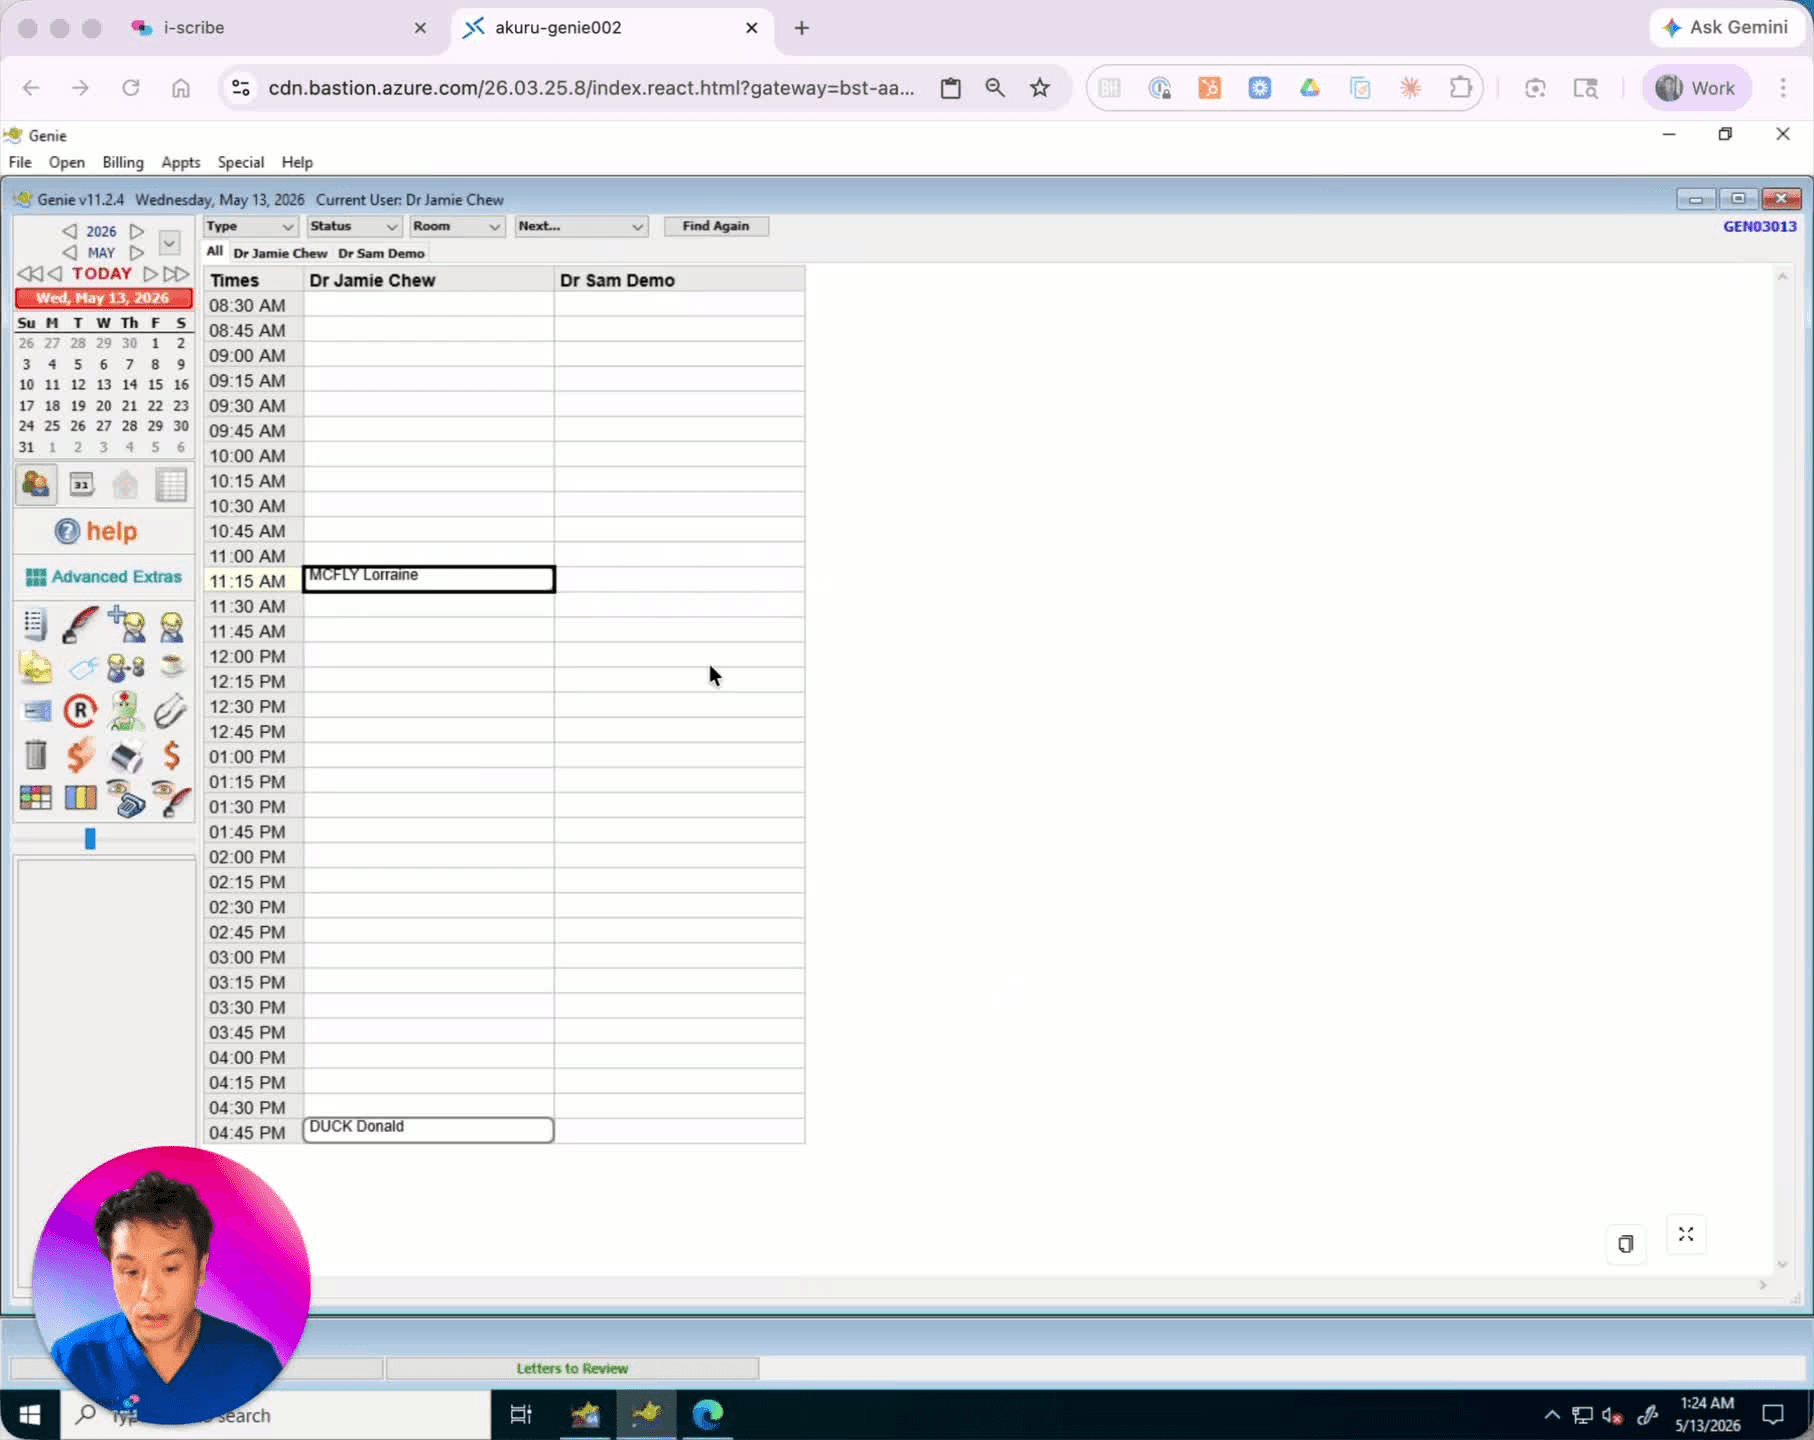
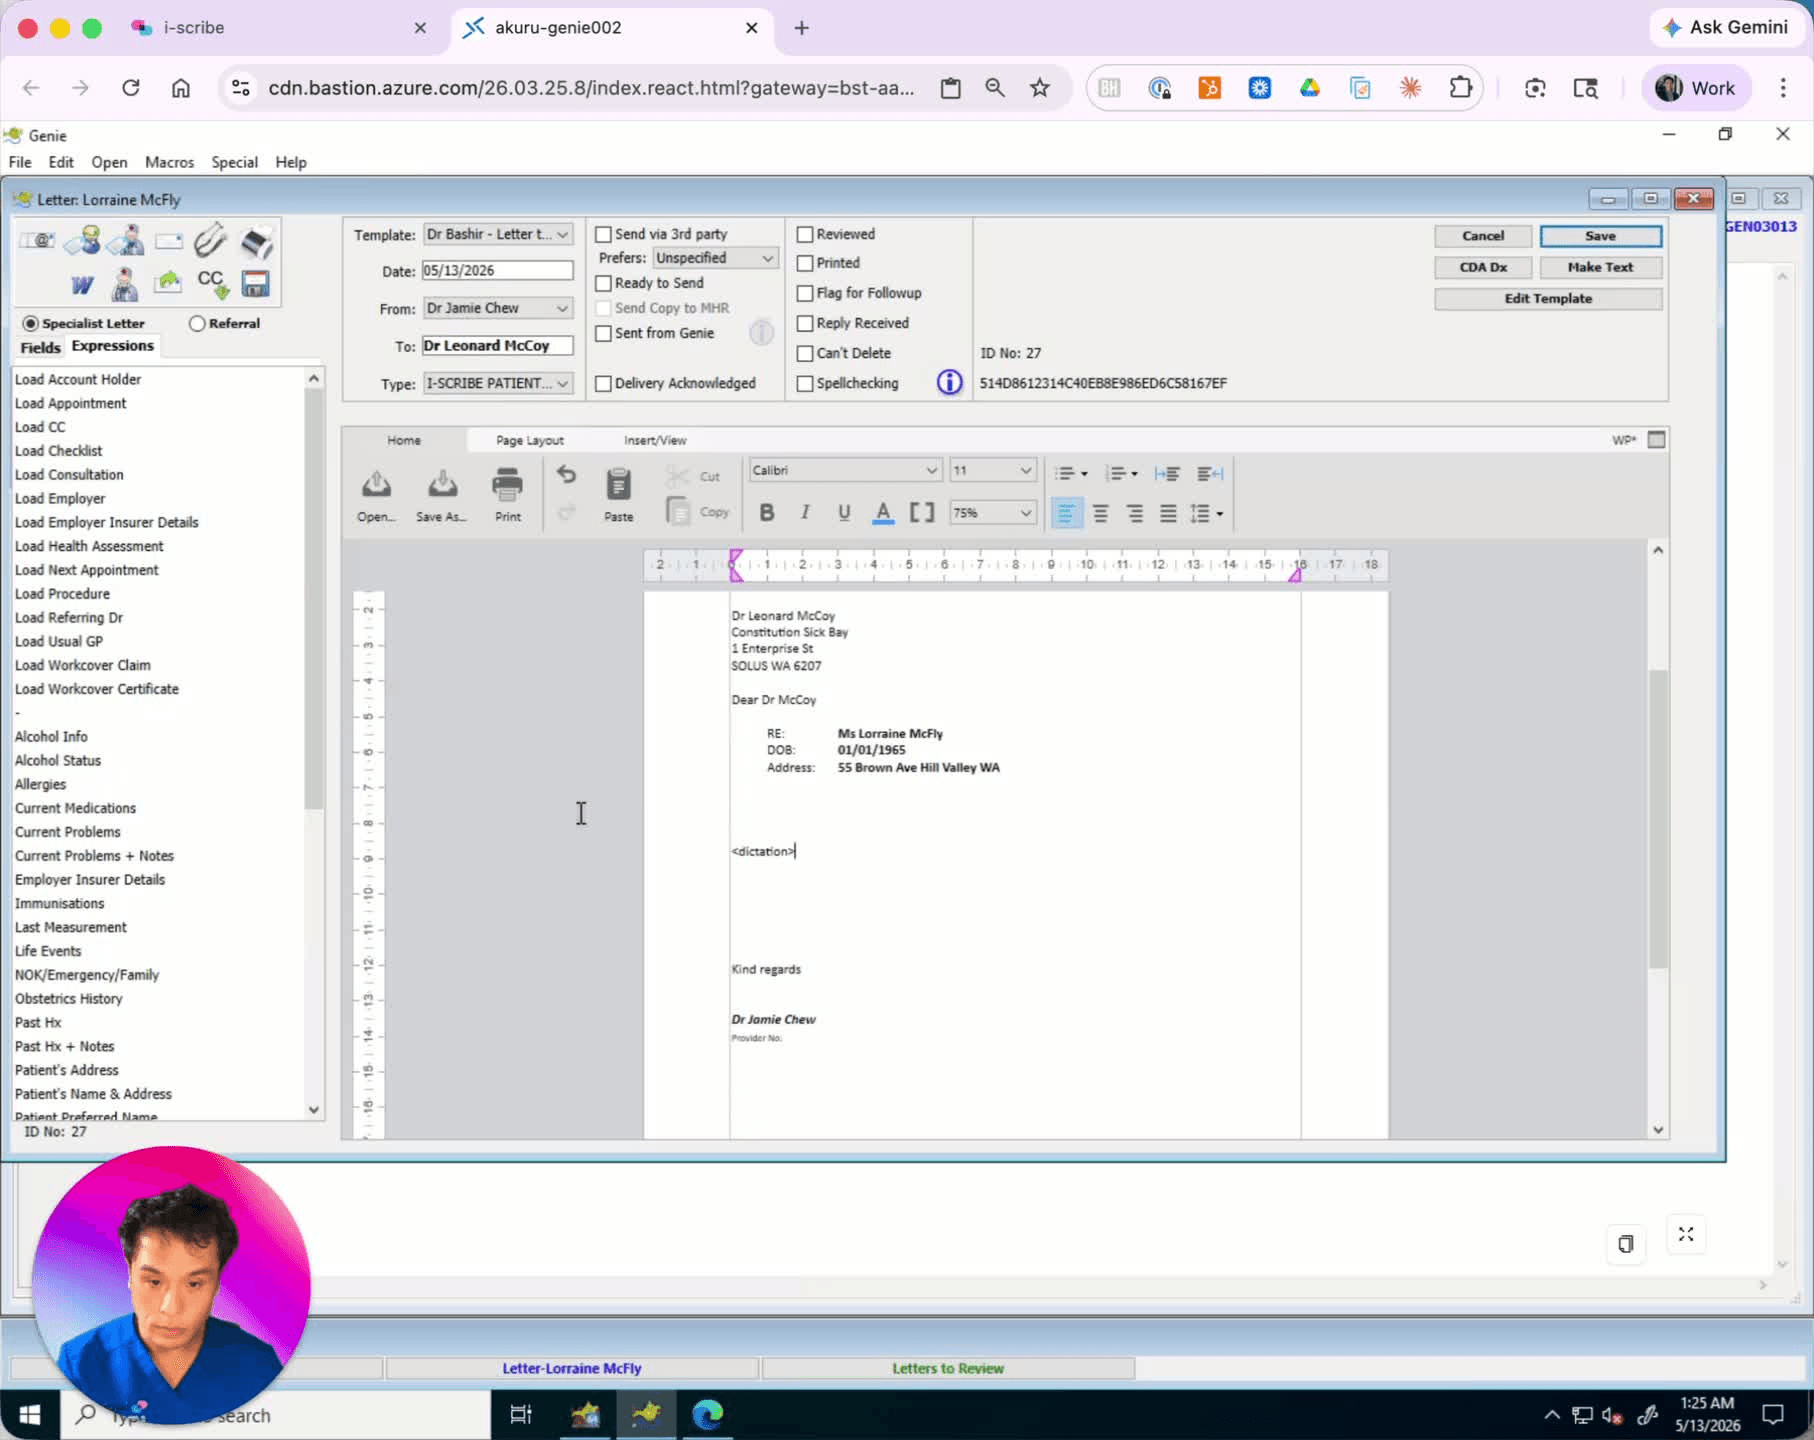
(0:15) Open Genie and click the quill icon to open the template drop-down. Identify the templates that will be used with i-scribe. If your clinic uses clinician-specific templates, rename them so the clinician's initials or full name come first. Then edit each relevant template so the i-scribe output will insert in the right place.
Step 2: Insert the i-scribe dictation tag
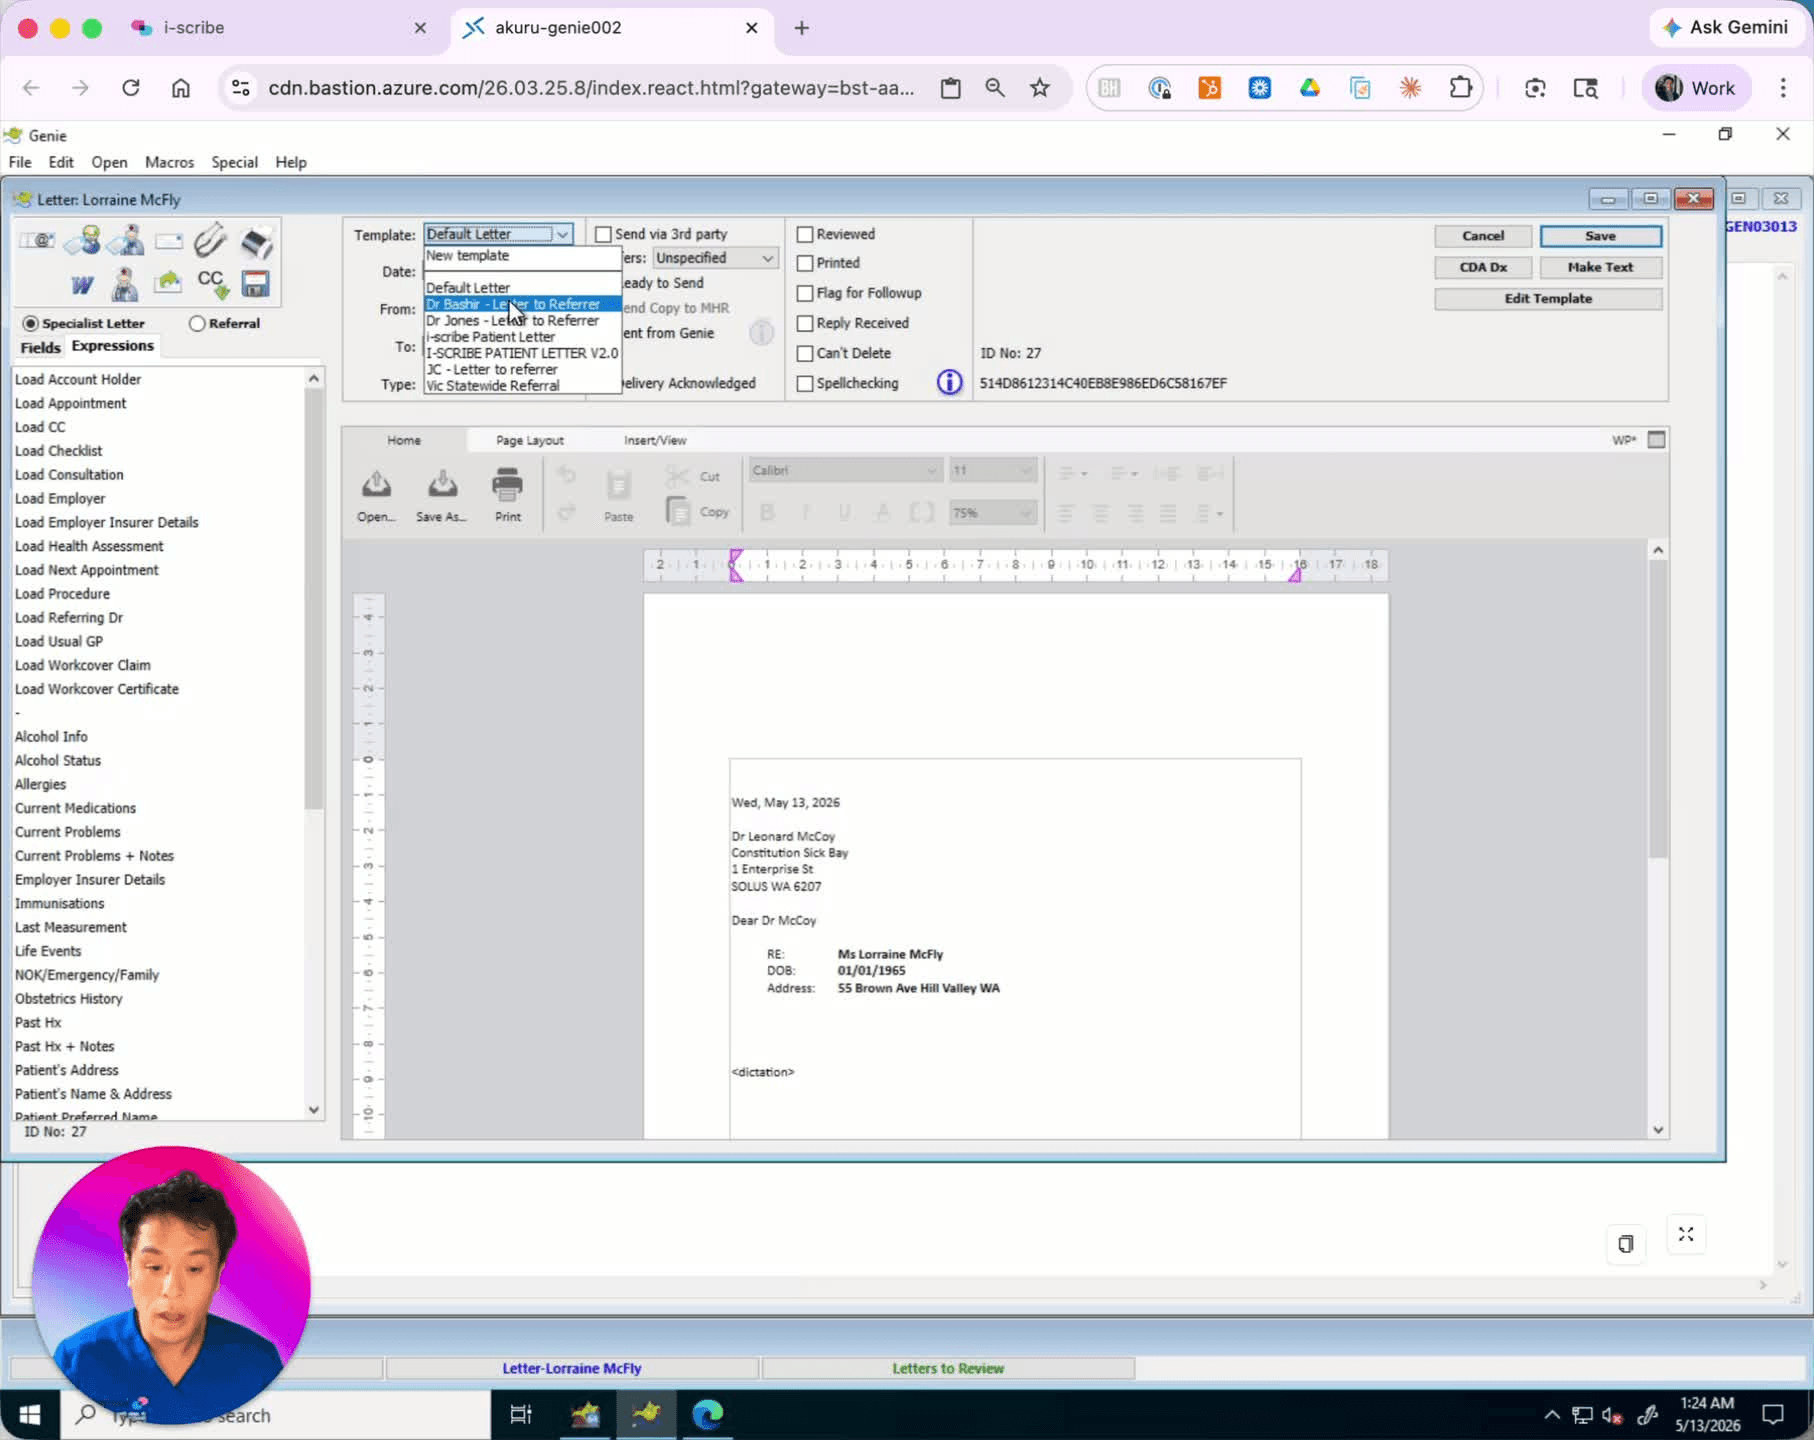
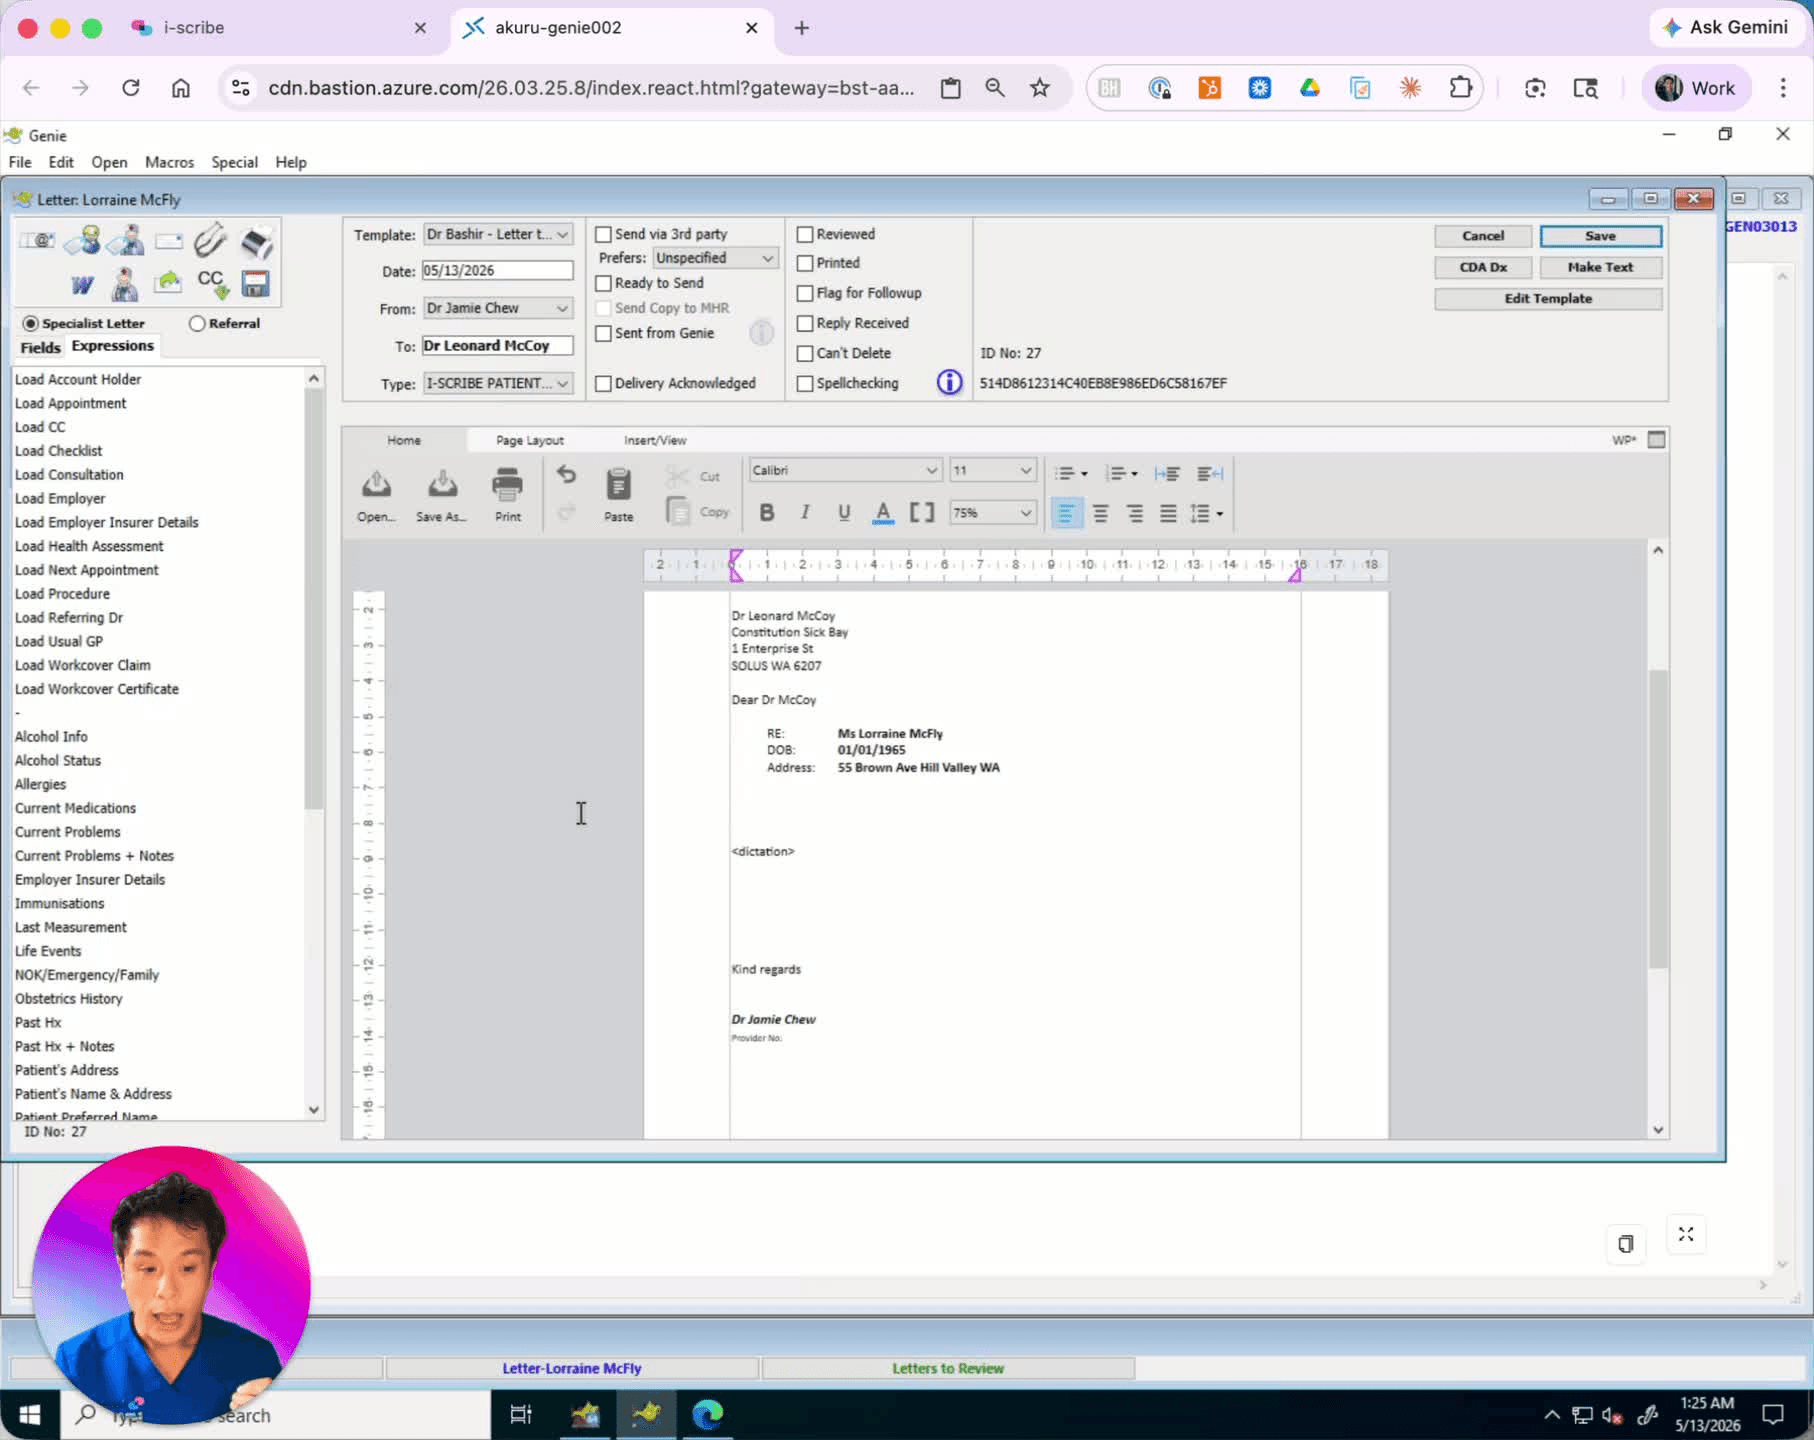
(0:47) In every Genie template that will receive i-scribe content, add the tag <dictation> at the point where you want the generated text to appear. The tag uses angle brackets, the less than and greater than signs. Most practices put it in the middle of the document, but use whichever position suits your layout. Save the template, or create a new one if you need to.
Step 3: Allow time for the templates to sync
(1:32) After you create or change a template, allow up to five minutes for it to sync across to i-scribe. If a new template does not appear straight away, wait and check again rather than reconfiguring it.
Step 4: Open the clinician's i-scribe integration settings
(1:40) Log in to the clinician's i-scribe account, go to Settings in the bottom-left corner, select Integrations, then open Settings under the Genie integration.
Step 5: Review the default Genie destinations
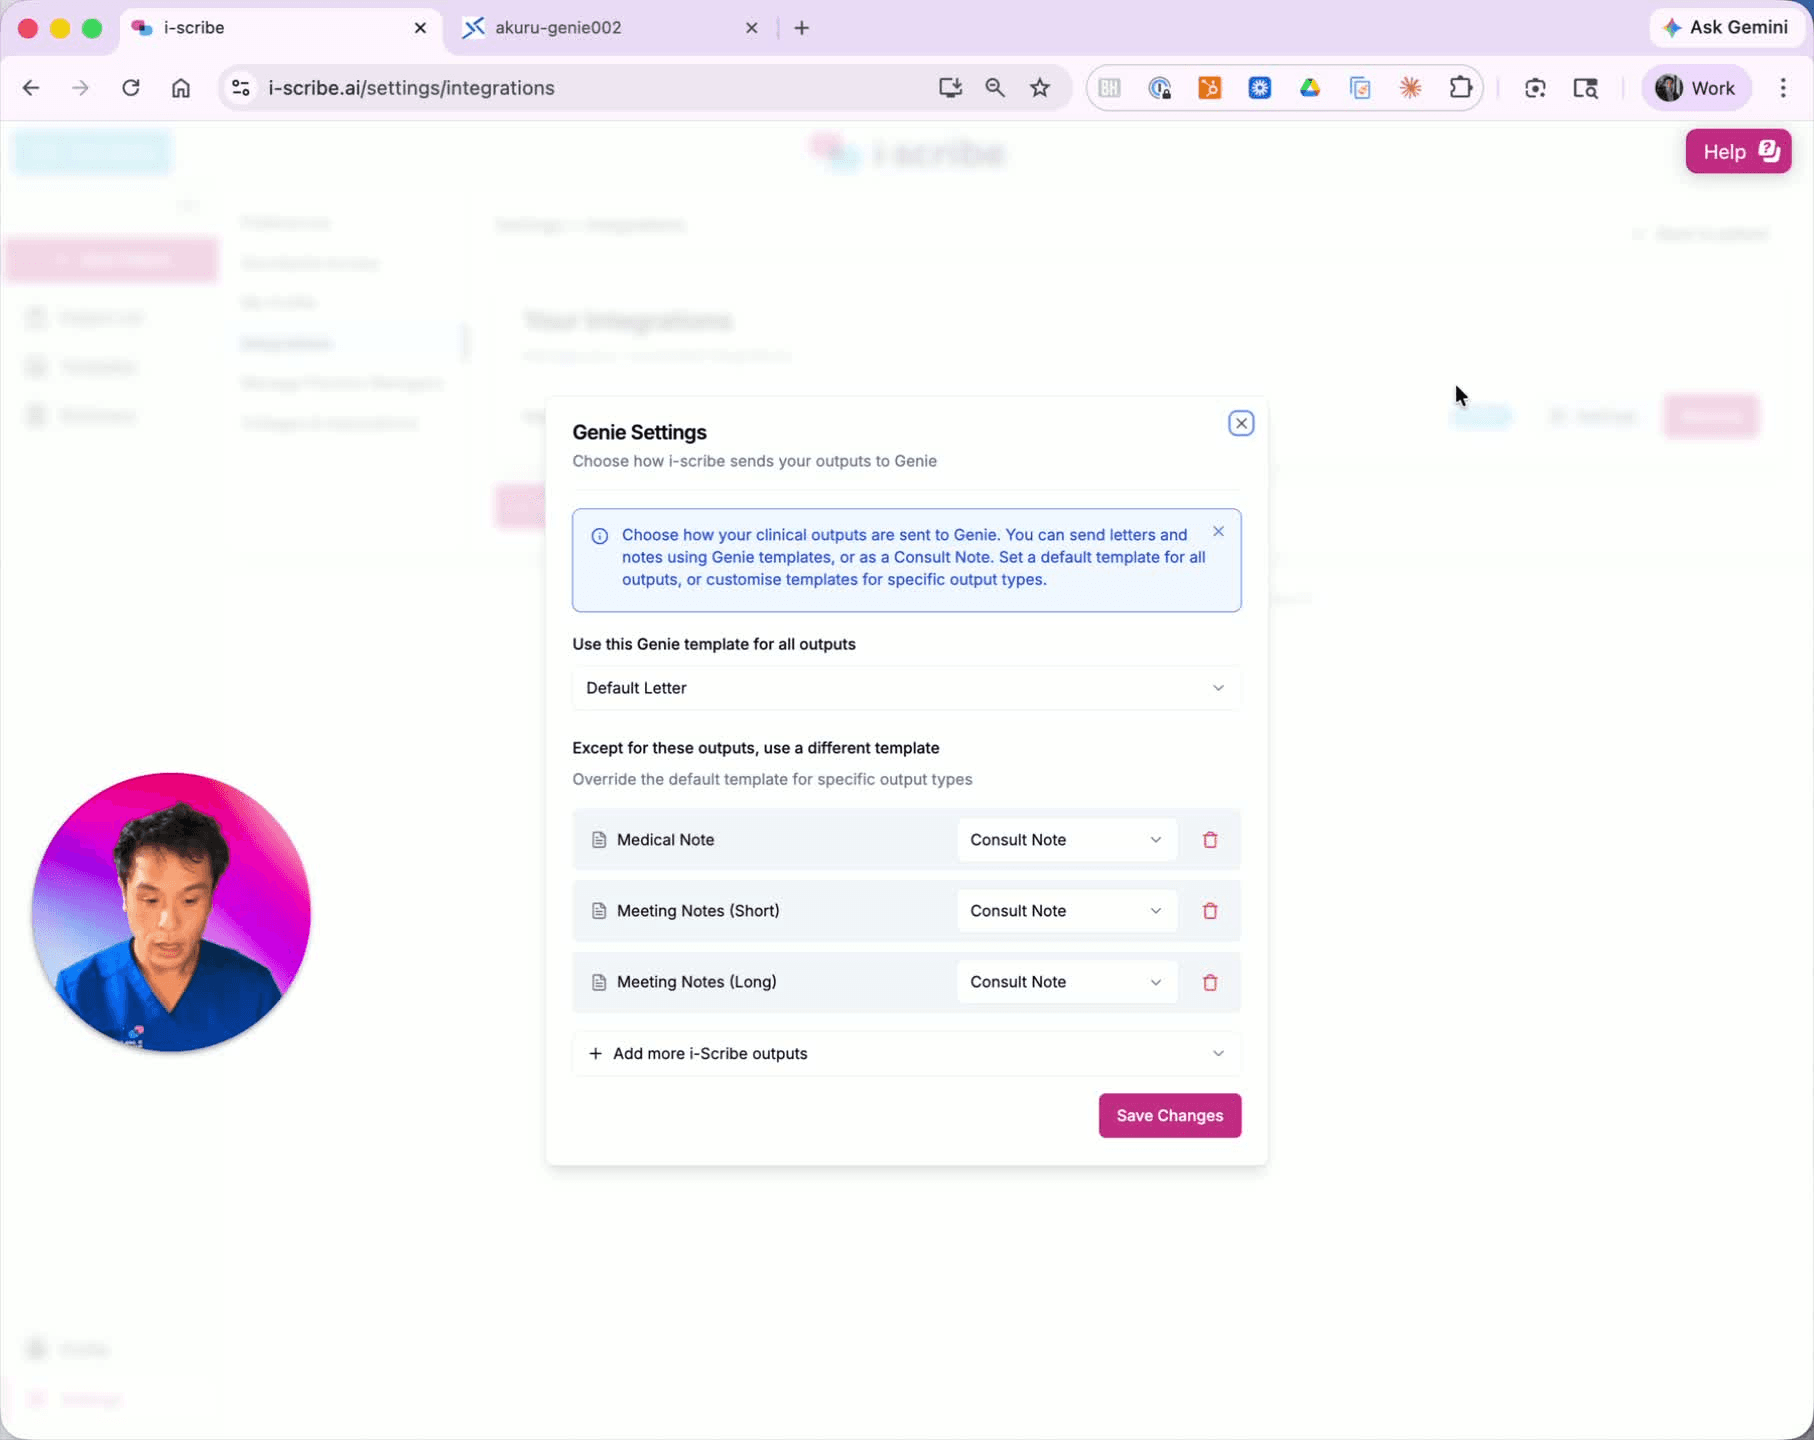
(2:05) Check where i-scribe is currently sending each document type. Medical notes usually go to the Consult Note or Consultation Record section in Genie. Review the defaults for medical notes and for short and long meeting notes, and confirm the routing matches how the clinic works before changing anything.
Step 6: Map each i-scribe output to a Genie template
(2:19) Work out which i-scribe outputs the clinician uses, then map each one to the matching Genie template. For example, Referral Letter Short maps to JC Letter 2 Referral, and Patient Letter maps to i-scribe Patient Letter Version 2. Check every mapping points at the correct destination template.
Step 7: Save the changes
(2:48) Click Save Changes, then confirm the settings saved. If a mapping looks wrong afterwards, open the settings again and recheck it.
Step 8: Ask support to turn on the button
(3:09) Once the Genie templates and the i-scribe mappings are done, email support@akuru.com.au and ask for the Approved for Genie button to be activated. This final step enables the document return workflow.
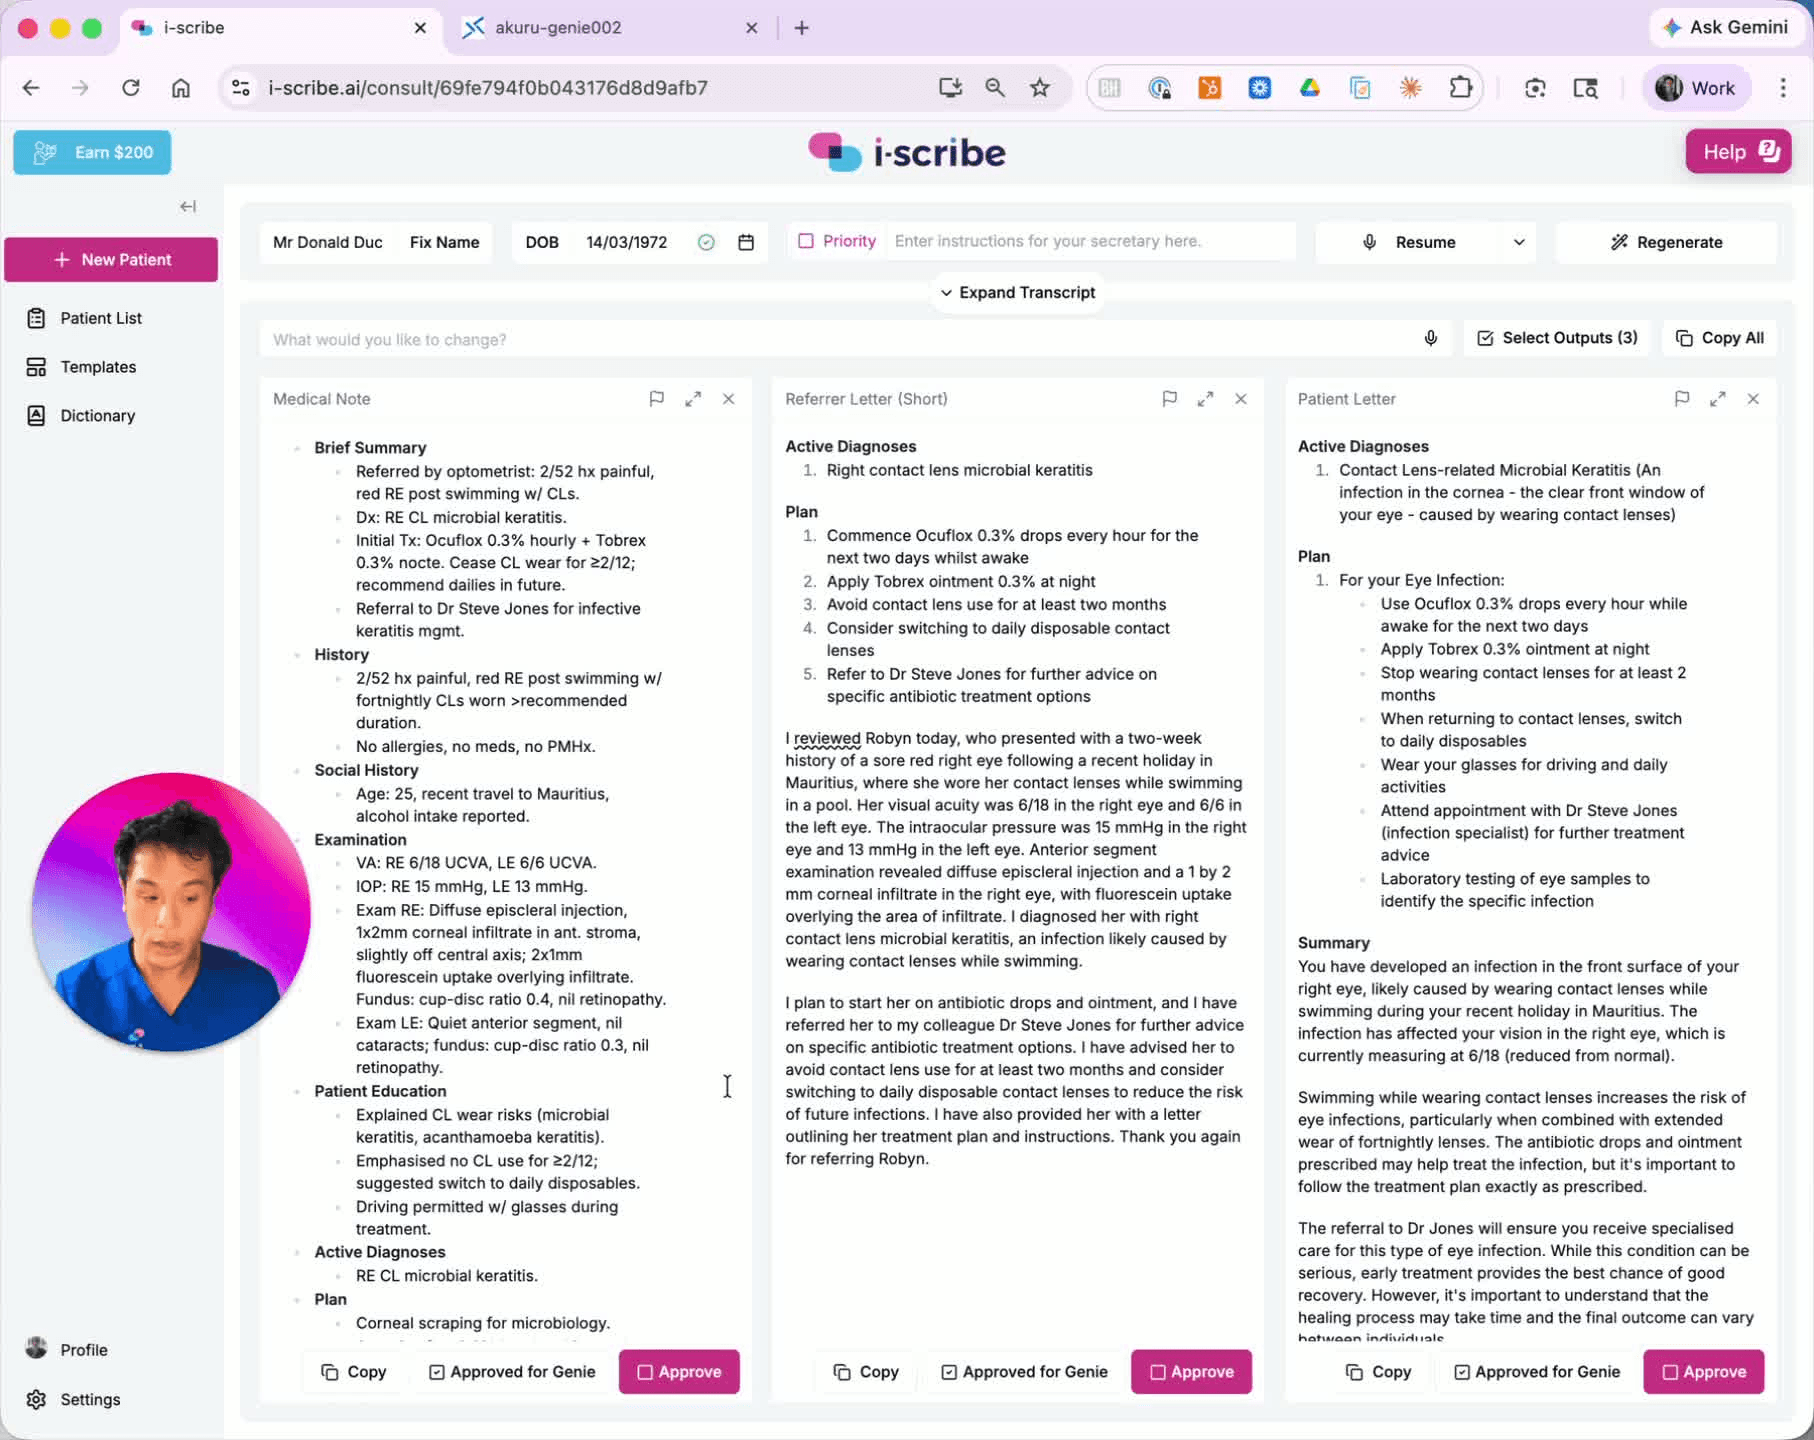
The sync agent runs every five minutes, so notes and letters should reach Genie within that window. If they consistently take longer, ask your IT team to check the sync interval on the Akuru Sync Agent is set to five minutes. Some older versions of the agent ship with a longer interval.
Using different templates for different outputs
You can point each i-scribe output at its own Genie template. A patient letter usually needs different wording and formatting from a letter going back to a referring GP, and a consultation note is laid out differently again. Separate templates also help when you want standard wording, risks, benefits or references to appear in one particular type of document.
To build a new letter template in Genie, see the Magentus guide to Customising Letter Templates.
Where your documents land in Genie
Consultation notes return to the patient's consultation record, attached to the relevant appointment.
Letters go to Genie's outgoing correspondence area. Your admin team can open the list from Open, then Outgoing Letters, and review, finalise and send from there. To change who a letter is addressed to, see the Magentus guide on how to readdress a letter.
Getting connected
If your practice does not have the Genie integration yet, or you need a new clinician added to an existing one, ask your practice manager or nominated contact to complete the Genie integration form. Once we have the information we need, we will start preparing your integration details.
Frequently asked questions
What is changing with the Genie integration?
Stage 2 of the i-scribe and Genie integration is being released. Stage 1 synchronised your Genie day list into i-scribe. Stage 2 allows documents created in i-scribe to be sent back into Genie, including consultation notes and letters.
What can I send back into Genie?
Consultation notes and letters. Consultation notes return to the patient's consultation record. Letters return to Genie's outgoing correspondence area, where they can be reviewed, finalised and sent by your admin team.
Is there any additional cost for the Genie integration?
No. The Genie integration is included as part of your i-scribe subscription.
Our practice does not have the Genie integration. What do we need to do?
Ask your practice manager or nominated contact to complete the Genie integration form. Once we receive the required information we will begin preparing your integration details.
How long will it take to connect i-scribe to Genie?
Once your practice manager submits all the required information in the Genie integration form, it takes on average five working days for us to provide the authentication details to your practice. Those details are emailed to your IT contact and practice manager. Final activation usually takes around 15 minutes and needs your IT team, or someone with access to your Genie server, to install and configure the sync agent. Most teams can do this without live Akuru support, but we are available to help if your IT team cannot proceed. Once the agent is installed and configured, the integration should be available within five minutes.
Our practice already has the Genie integration. How do we add a new clinician?
Complete the new clinician request form and our team will add the clinician to your existing Genie integration.
We already have the Genie day list integration. What do we need to do for Stage 2?
Prepare your Genie templates so they can receive text from i-scribe. That may mean creating new Genie templates or editing existing ones. You also need to select the correct Genie template inside i-scribe for each document type.
How do I prepare my Genie templates to receive i-scribe documents?
If you do not have suitable templates, create a new letter template in Genie. If you do, edit the existing ones. Either way, insert the tag <dictation> where you want the i-scribe text to appear. The tag uses angle brackets, the less than and greater than signs. i-scribe then inserts the generated text at that position in the Genie template.
How do I create new Genie templates?
See the Magentus guide to Customising Letter Templates.
Can I set different templates for different i-scribe documents?
Yes. You can configure a different template for each document type, so a patient letter, a GP or referrer letter and a consultation note can each return to Genie in the format that suits your workflow.
What are some useful reasons to have different templates?
Different templates keep documents consistent and appropriate for their purpose. A patient letter may need different wording and formatting from a letter going back to a referring GP, and a consultation note may be designed differently from outgoing correspondence. Templates are also useful when you want standard wording, risks, benefits or references to appear in specific types of i-scribe documents.
After clicking "Approved for Genie", how long will it take for my notes to appear in Genie?
Notes and letters should usually be available within five minutes, because the system synchronises every five minutes. If your documents take longer than that, ask your IT team to check the sync interval on the sync agent is set to five minutes. Some older versions may be configured with a longer interval.
Where do consultation notes go in Genie?
They return to the patient's consultation record in Genie, attached against the relevant appointment.
Where do letters go in Genie?
They return to Genie's outgoing correspondence area, where your admin team can review, finalise and send them. To open the list, go to Open, then Outgoing Letters.
How do I readdress a letter in Genie?
See the Magentus guide on how to readdress a letter.
Still need help? Email support@akuru.com.au.
Was this guide helpful?